Monday, July 30, 2012

GARDEN OF A MILLION DREAMS

Hello everyone.  This is Alex Sanders from Project Worth Outreach.

Project Worth Outreach held our latest meeting on July 23 followed by a cookout.  We had lots of good garden food at the cookout that was grown by our participants in their garden.  We had approximately 60 people in attendance.  We had several participant's turn in some impressive harvest numbers for the month of July.  Most everyone seemed pleased with the progress of their garden since we had received several days of rain.  In recent weeks I have visited every garden site in our program and I must say that the gardens are looking pretty good. 

Below you will find a statement from one of our youngest gardeners who also happens to be my nephew.  He told me how much he enjoyed writing this blog post and I told him that was really interesting and I expected him to make more post in August and September.  I hope you enjoy his post.

After Ben's post please find this week's recipe.  Hope everyone has a great week.
Ben Hall


GARDEN OF A MILLION DREAMS

Hello, my name is Ben Hall.  I am a participant In the Project Worth Outreach/Grow Appalachia Gardening program.  I am 11 years old. This is my first gardening experience ever. When I first was told that I was going to be a part of my very first garden I was very excited. The very next day after I was told, I went to school & started to tell my friends & ask if they had a garden. After I found out what they were growing I told them the things that I knew that we would be growing, such as green beans, potatoes, lettuce, peas, & a bunch of spices. My teacher had just finished teaching us about how the Native Americans & the Pilgrims had bartered when they wanted to trade crops. Then at about the end of the school day, my friends & I started talking on the bus about things that we could barter since my family absolutely loves corn & we weren’t growing any corn, I asked some of my friends that were growing corn if we could barter some green beans, or something that we were growing that they weren’t.

  On the first day, we started setting up some supplies that we would need for the garden since we were going to have a raised garden. We had to set up wooden beams to predict the size of the garden plots that we would plant. The first ones that we set up were the longest sections so we wouldn’t have to worry about that. Then we set up the smaller sections that we would be planting in. After that we took a little break to eat lunch, & after we came back from eating lunch, we put down landscape plastic in every section that we were using. After the landscape plastic was intact, we cut little holes for the seeds to grow. When we finished that, we started to put down the soil that we needed. We filled almost every section then we ran out of soil. After we ran out of soil, we just called it day as my uncle Alex Sanders went to get more soil.
 After we got all the soil in, we started to plant the seeds. The first types of seed that we planted were pea seeds. Then as we got them in, we planted more & more seeds. After we got the green bean seeds in the mail, we planted those. Then we planted potatoes, and then when we got them in, we planted lettuce, cilantro, & other spices like tarragon.
 Some of the funny things that have happened to our garden are that first we got kind of dirty putting in the soil which was fun, then we developed a big problem with cats pooping, & running through our garden. After we found out what our problem was, we put of some chicken wire to keep all the animals out of our garden. After we got rid of the cats, the weeds became not a huge problem but one that we needed to get rid of very quickly. So as soon as we started to see weeds, we started to pull them. We pulled weeds for about a week then the weeds started to die down & that was the last we saw of the weeds for a few weeks. After about 5 weeks with no weeds, they came back, but before we realized that we had weeds, I started to trip over some over grown weeds. Then my uncle Alex Sanders bought a sprinkler & we played in it a lot sometimes after we finished our garden work for the day.
 After a few months of having a garden, we started to get things that we could harvest such as green beans, lettuce, & potatoes. To me, planting & picking were the best parts of the garden. I know that a garden is a lot of work but it all pays off in the end if you get any fresh garden food out of your garden. This was my first experience with a garden but I hope that I can definitely get more green beans, potatoes, & other fresh foods out our garden this year. Some things that I would like to grow next year would be the three sisters which is corn, green beans, & squash all together & I would also like to grow watermelon next year as well. I hope that we can grow a garden every year for the rest of my life.
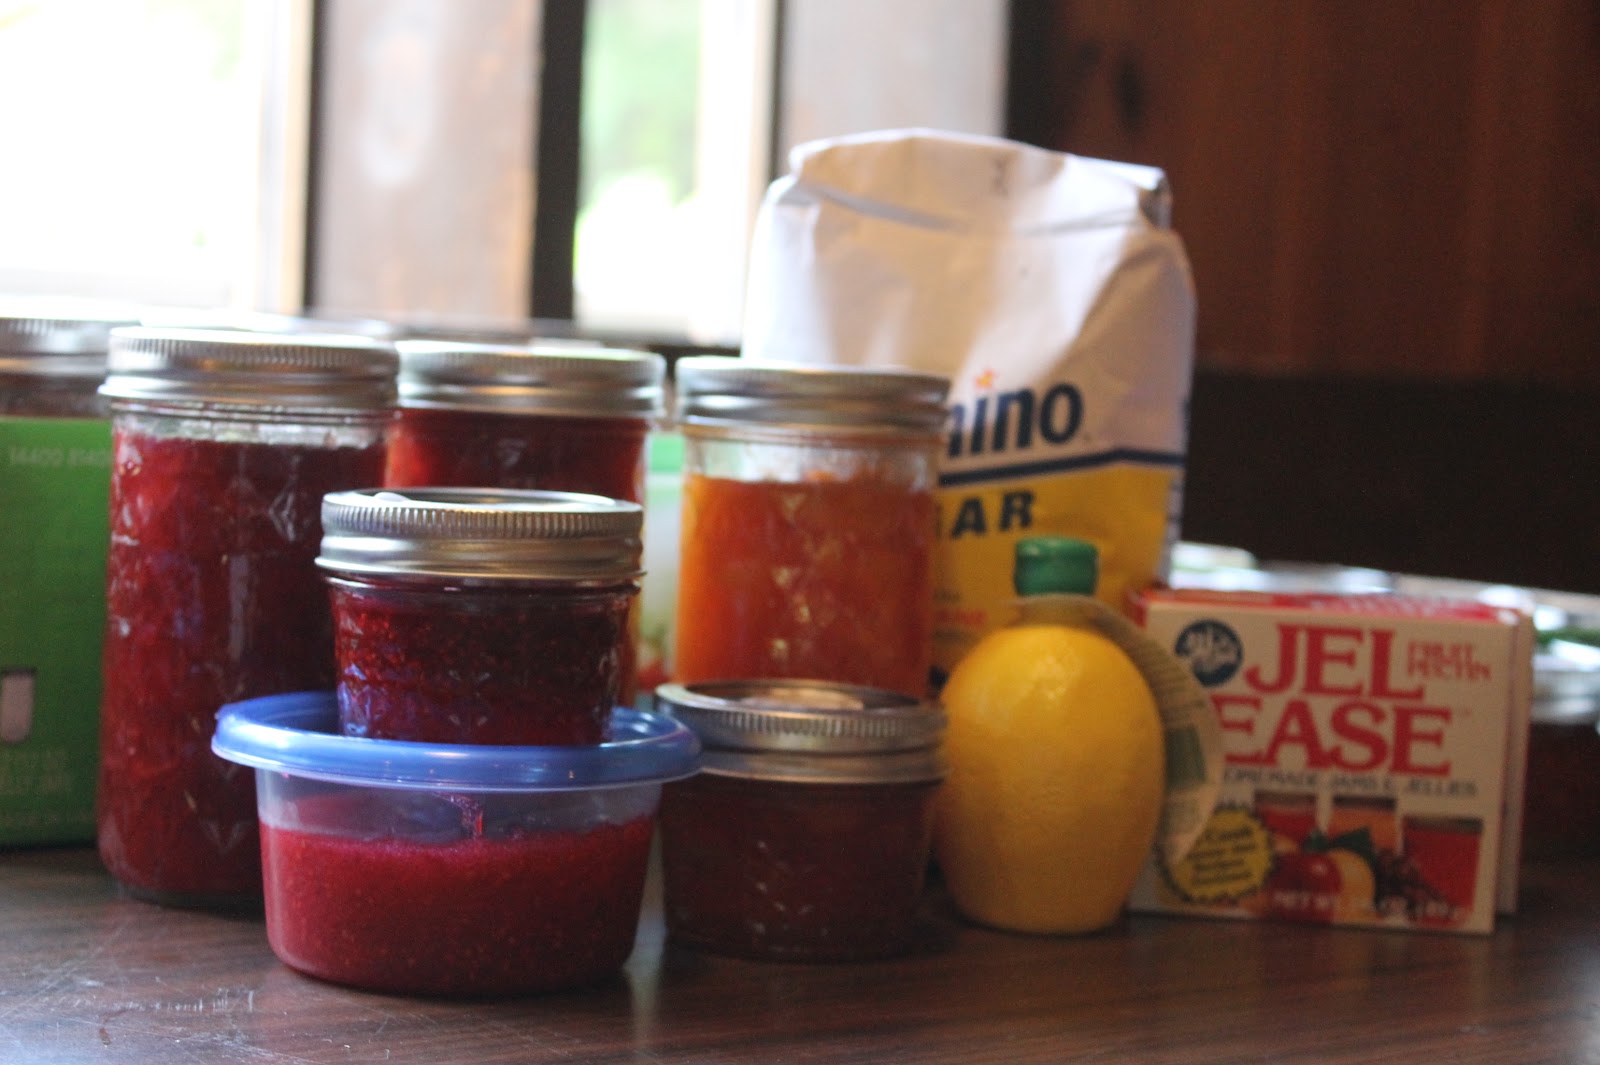
This week's recipe:

Quick Zucchini Cake W/ Cream Cheese Frosting

Cake                                                      Frosting
1 box yellow cake mix                         1  8 oz. pkg. softened cream cheese                                         
4 eggs                                                  1  box powdered sugar                                  
1/2 cup vegetable oil                           1/2 stick margarine {softened}                     
1 table spoon vanilla                            1 teaspoon vanilla
1/2 cup raisins {optional}                     chopped nuts              
1/2 cup chopped nuts
1 teaspoon cinnamon

Beat cake mix, eggs, oil,                     Beat cream cheese and margarine
cinnamon and vanilla                          until smooth.  Add sugar and mix well.
together in large bowl                         Add vanilla and beat until smooth.
for 6-7 minutes.  Fold in                      Spread on cake.  Add pecans on top.
zucchini, raisins and nuts.
Grease and flour a 10 inch
tube pan or bundt pan.
Spoon in batter, bake at
350 degrees for 40-50
minutes for doneness.
Cook until toothpick comes
out clear.  Top with cream
cheese frosting. 

I submit these recipes as given to me.  Please feel free to substitute healthy ingredients whenever possible.

Sunday, July 29, 2012

Scott County Grow Appalachia

 Potato Seed Pods 


images-3.jpegAt one of my site visits, a participant handed me a cluster of small tomato fruit that she found growing out of her potato plants.  "What is it?", she asked.  Even after growing potatoes for many years, she had never seen anything like it before.    Maggie from Pine Mountain told me that they are seed pods.  

When potato plants have flowered, some varieties will produce small green fruits that resemble green cherry tomatoes.  These pods contain up to 300 true potato seeds.  When the pods become soft, the seeds can be harvested by finely chopping the pods and soaking  them in water.  The pulp and seeds will ferment, the pulp rise to the top and seeds will fall to the bottom. After rinsing and drying the seeds, they can be stored in a cool place until they are ready for planting in the spring.


Although potatoes can be grown from seed, most people grow potatoes from tubers, because potato seeds may not produce the same type of potato that the seed came from.  They may produce a wide array of potatoes which may or may not have a good flavor or texture.  Also, potato seed pods contain large amounts of alkaloid solanine and are poisonous to eat.

    Garden Participant of the Week  - Mrs. Lackey

SDC10274.JPG.jpg


"I am a wife, mother to six children, grandmother to three grandchildren,  I attend St. Jude Catholic church. I enjoy gardening, quilting, sewing, making rosaries that I send several Priest in Uganda  for orphans, sick and elderly folks. I love being outdoors in my garden.  When I work in my garden although it is work I find it helps me relax and I find myself thinking of everyone I promised to pray for, I grow my garden because I want healthy foods for my family and friends.  I know exactly where my food is coming from and what goes into that process."                                                                              


Mrs. Lackey volunteered at the health fair.


SDC10265.JPG.jpg
Mrs. Lackey met John Paul Dejoria at London, Ky gathering


Friday, July 27, 2012

A Good Hay Day and a Rabbit-Proof Fence -by Erica at High Rocks

Stylishly dressed for the office, the managing editor of the Pocahontas Times, Jaynell Price-Graham, climbed up on her old John Deere tractor to expertly place a round bale of hay in our truck.  Just another example of the varied talents found in the people of our county!  We delivered this donated mulch hay to four participant gardens.  It felt good to cover the bare ground before the heat of late summer sets in.

We also sent of some samples of some spotty tomato leaves to WVU for culturing and diagnosis.  We didn’t see late blight here last year, so we are hoping for good news.  In the meantime, we’ve advised our gardeners to use Serenade preventatively. 


Today we visited the community garden at the Family Refuge Center Shelter to deliver rabbit fencing.  Their garden looked lush and well-cared for.  The FRC Shelter is a temporary home for families who are victims of domestic violence.  The children who recently stayed at the shelter were enthusiastic green bean pickers.  Some never before had green beans that didn’t come from a can.  Brenda, their garden coordinator, said she had a glut of summer squash and the families staying there weren’t eating it.  She took it to a local restaurant and sold it for $10—money that will go back into the shelter’s operating budget.  As we stretched the fence around the perimeter, she showed us the watermelons and pumpkins that the Girl Scouts started and planted—a future treat for families in need of a little more sweetness in their lives. 


A Veteran Gardener's Way of Freezing Corn: Tina

From the Hoskins Garden with the LCAAHC. This year our corn did not produce very well, the ears were small and many were not filled out all the way. We bought the Peaches and Cream variety. We planted 4 rows in the Spring and only got 16 quart bags out of it. But we are thankful for what we got, according to the news, many corn fields have withered and died due to the drought and heat. I learned how to put corn in the freezer from my veteran gardener, Mother in Law. Her Mother taught her this way many years ago. It is a method that retains more of the vitamins and flavor because you are not pouring out the water from the boiled ears of corn. First you start with clean corn with all silks removed. Then in a big bowl, cut off all the corn and scrape the cob.


Next in a large skillet put the corn and add only a SMALL amount of water to keep it from sticking to the pan. Cook on medium-high heat for 3 minutes, stirring and turning corn constantly to keep it from sticking. Almost all of the water should have evaporated out by the end of 3 minutes.


Then pour into a large bowl and place in ice water bath and cool completely. Stirring it occasionally to release the heat and steam.


Then spoon into freezer bags. I like to lay mine flat on the counter and I fill them to get more room in the freezer.


There are many ways to put corn away but I thought I would share my way with you as well. Were hopeful that our late crop of 4 rows will produce more or else it's slim pickin this winter.
Enjoy!

Peace, Love & Happiness – Red Bird Mission


   Greetings from the mountains of southeast Kentucky.  It’s been a busy couple of weeks for us and we got a little behind on our blogging.  We apologize.  I have been loving your entries the last couple of weeks.  I wish to express my appreciation to Constance for getting John Paul’s speech on “the tube.”  I thought I was recording it on my phone – NOT! 
   As a child of the 50s and as a teenager in the late 60s, I totally resonated with JP’s speech as well as the name of his foundation.  He reminded me of my days living just north of San Francisco during the make love not war era.  As members of the Grow Appalachia family we have such a blessed opportunity to touch people’s lives and to be transformed by their lives as well.  Peace, love and happiness are contagions.  When someone treats us with the true love and care that God desires to see in us, we can’t help but share it.  And like the ripple effect of throwing a rock into a still pond, the effect (ripples) are carried on…and on….no matter how minute the stone or act of kindness is. 
   So my word of encouragement this week is this- YOU are valuable.  Your work is valuable.  Every seed you plant, every drop of water you drip, every person you help, matters and is changing the world for the better. 
    Yesterday we had our annual Tri-County Health & Resource Fair at Red Bird Mission.  And as I was hauling tables and boxes from one building to another (in the 1,000 degree heat and humidity I swear) I wasn’t necessarily thinking that way.  The work we do in ministry to others is sometimes all-consuming and physically exhausting.  BUT WE ARE MAKING A DIFFERENCE!
   I wanted to tell you how much I appreciate all that you do – all of you.  And I am honored to be a part of this awe-inspiring movement.  Thank you John Paul, Constance, David and Tommy (for throwing it out there), for bringing this “family” into being.  Grace & Peace - Karen Dial

The Grow Appalachia Influence goes International~ Pine Mountain, Theresa Osborne


This post was written by Theresa Osborne. Theresa, her husband Mitch, daughter Valerie, and numerous other family members have been involved in Grow Appalachia at Pine Mountain for 3 years now. The Osborne's are a dedicated GA family that is always excited to learn new gardening, cooking, and agricultural skills. We were very excited to hear about their recent success sharing Grow Appalachia skills abroad, and as always we are very happy to have them involved in our program!
-Kathleen

      This summer my family and I got the opportunity to take Grow Appalachia, international. The first two weeks of July Valerie, Mitch and I went on a mission trip to Belize Central America. We have been going to this rural farming village of Mafredi for about 12 years and we have made some great friendships.
Mafredi Belize has a lot in common with Appalachia. It is in the southernmost district, it is an area not frequented by tourists and it has high unemployment and poverty rates. Historically families had lived off the land with jobs providing supplemental income. Each Wednesday and Saturday morning the main town in the area, Punta Gorda, has a market street filled with vendors selling fresh produce, spices, herbs, and even fresh shrimp and fish. As we planned for our trip we wondered if there was something from Grow Appalachia that we could share with our friends in Belize.
     With that in mind, we bought a pressure canner and packed it into our luggage, and got a copy of the parts list and blue prints for building a PVC pipe chicken tractor. When we arrived I started asking our hostess Mrs. Deena Parham if she thought the women of the village would be interested in learning to can vegetables. She said she didn’t think so, because most people preferred fresh vegetables from the market. I felt a bit discouraged because we had gone to such expense and planning to get a pressure canner into the country.
Salsa preparation
    Then I noticed that she was using commercially canned salsa in some of her recipes. I asked Ms Deena, if she would like to learn to make her own homemade salsa and pickles (cucumbers are usually abundant). Her husband, Mr. Jerry, said he loved pickles, but couldn’t afford them. We looked in town and small jar of pickles was around $12 Belize, or $6 US. So we made plans to have a pickle and salsa workshop.
   We set about gathering our ingredients. Our one challenge turned out to be finding the dill for the pickles. Evidently there are only a few of the immigrant families that actually grow it. It took us a few days but we finally found enough dill for our project. On that Saturday afternoon, Valerie and I gathered in Ms. Deena kitchen with three other village women Ingrid Gonzales, Carla Rodriguez, and Rosa Parham to make pickles and salsa.
They were all fascinated with the process. When we finished making the dill pickles, they kept asking, “Is that all there is to it?” They were very excited about tasting the product in the next week after the jars had had time to “Pickle.” Then we started on the homemade salsa, a little more labor intensive process. But we quickly began to laugh and talk as we chopped fresh jalapenos, cilantro, onions, and scalded tomatoes to remove the skins.
Carla with some of the finished salsa and pickles
    We actually got so involved in talking that we ended up with about four times the amount of jalapenos that I usually use in this recipe. Ms. Deena kept assuring us, “Those peppers don’t burn. They just add flavor. I don’t think it is going to be very hot.” Valerie and I looked at one another and were pretty sure this was going to be an EXTRA hot batch of salsa. As we began to cook it, we pulled out spoons for taste testing. When Mr. Jerry came in we gave him a sample taste. He described it as “Devil Juice.”  We worried that maybe it was too hot, even though most Belizeans prefer very spicy food.
That evening at supper, we opened a jar of the salsa for everyone to try. It was a great hit, and had just the right amount of heat they all said. Even Ms. Deena had to admit that it had heat as well as flavor.
Trimming bamboo to fit in PVC pipes

    We have been so happy with our family’s chicken tractors; we wanted to share that idea with the village. At first it didn’t seem like the idea was going to go over well, but we forged ahead anyway. At home we had used metal conduit inside the PVC to add strength to the structure. In Belize, the high cost of metal conduit called for us to come up with a Belizean alternative. We still wanted to use PVC pipe, even though it was pretty expensive, because termites are a real problem for anything made of wood. But, we decided that bamboo sealed inside the PVC pipe would work to add needed strength. So we asked one of our workers and long-time friend Isadoro Sotz to go into the bush and chop us some bamboo that would fit inside our one inch PVC. It took a little trimming, but it fit right inside the pipe, and provided plenty of strength.
     It took several days to build the tractor because we were doing other work, but we were ready for the roof by the time we left. We left it up to the community whether to put a metal or palm thatch roof on it. But we added extra wire over the area where the roof would go just in case they decided to put a thatch roof for extra security.
Valerie and Isadoro putting wire on the chicken tractor
    We decided that we would give this chicken tractor to the village school to help with their feeding program. They could eat the eggs, sell the eggs, or raise meat chickens to eat using the tractor. Isadoro became very interested in the tractor idea, as did our host, the school principal and a Pastor friend of ours from a neighboring village. They all wanted copies of the plans so they could build their own chicken tractor and show others. Carla Rodriguez also wanted to see about building one for her chickens. Her father has an organic farm and she raised her chickens there and was having a hard time keeping up with them and finding the eggs.
We have been asked that from now on, whenever we come back the villagers want to do more of these food preservation/preparation workshops. All in all it was a great sharing experience, and one we would not have had if not for our participation in Grow Appalachia.

Thursday, July 26, 2012

Married to the soil in Abingdon VA

Heather here, riding the community garden high.

This week has not held a lot of interaction with participants, other than a few more garden maps and crop quality surveys I've received in the mail. At our last workshop we went over crop rotation and garden mapping and planning, and I gave each participant a stamped envelope and a piece of graph paper, asking them to map their gardens and mail me the design. I will be visiting some more gardens tomorrow as well, and hopefully collecting more pictures and video footage.

It rained so much for so long that the soil is just beginning to dry out today. Consequently, we spent today weeding and mulching pathways. It is definitely one of the more pleasurable things in life to see a well-weeded pathway.

I thank our steadfast volunteer, Nora, for this. It was pretty out of control before!


We found a few baseball bats--little guys that took off with all the rain:


In other news, our watermelon patch is still going strong. The third succession is sprouting up. Watermelon seeds are so funny looking!

Cotyledon--the embryonic leaves. Our 3rd succession is coming right along...will we get melons before it gets too frosty? Will covering with reemay help? Will the melons suddenly learn to love the cold? Only time will tell. 


 I've been reading up on different ways to use the rind and seeds...in some countries such as India and the Philippines people have traditionally sprinkled the seeds on baked goods or made a sweet melon seed paste, and used the rinds in anyway imaginable..I'm going to look more into it and see if any of these recipe ideas might be keepers...I love the idea of using the whole entire fruit but am not sure if I'd want to eat a fried melon rind or a melon rind salad...maybe. When I first started googling the idea I came across some potentially useful information:


Why cant you eat the black seeds in watermelon?


  • Get out of here baby cuke! This is about watermelon! Oh well, you're cute. And pokey. 
  • you definitly can.
    it just isnt as good for your body.
    it pushes your digestive to work harder to digest them if you have to many.
    they are chewy and not to apitizing.
    they really wont grow a watermellon in your belly.
    so you can eat them,
    its just a all around better choice not to!

    Source(s):

    my brain!
    0% 0 Votes
  • you can. however, it may not be very comfortable because it will cause you to grow a watermelon in your belly. no one wants that. your best bet is to spit them out... unless you like to live dangerously...

I haven't decided if I want to live dangerously or not.

I better decide soon though because the melons are taking over!

Our 1st Succession. The Second Succession you can kind of see right next to it. 


Well, that's all for now all you wonderful growers and plant appreciators. 

Wednesday, July 25, 2012

Henderson Settlement/ White Oak Happenings ~ Jackie Waldroop

Baked Tomatoes and herbs for Tomatoe Confit
If you were visiting here at the settlement yesterday you would have heard the sounds of children laughing, sweet music playing and smelled the aroma of Tomatoes cooking.

We had several events happening at the same time, our outreach department had their annual Back To School Blast, the children had a blast playing on the slip and slide,winning at games, eating cotton candy, and receiving new backpacks and school supplies. While the children were having fun , their parents were given the opportunity to take part in Grow Appalachia's latest class presented by Kristin Smith from the Whitley County Extension Office. The class was titled, "Preserving the taste of Summer".  Kristin brought several different kinds of  HeirloomTomatoes for the participants to try,
she brought, Black Cherry, Sungold, Lightbulb, and Cherry Midget tomatoes.
Some of the tomatoes were especially juicey, as I found out when I bit into one and juice squirted all over me and the four year old standing in front of me. OH BOY!, I thought I was in trouble with the four year old but he just looked at me and started laughing.
Herbs used in the Tomatoes Confit and  Pesto
Some of the class

June, Jill and Sarah help Kristin


Helping to make Tomatoes Confit
  
Trying different types of Tommy Toes 
Kristin sharing Tomatoes


TOMATOES CONFIT


1.Start with 2 pounds of tomatoes (Heirloom are best!).

2.Wash and dry them, then slice them in half. Pour enough decent quality olive oil in the baking dish so that it just covers the bottom of the dish, somewhere between 1/4 cup and 1/3 cup.

3. Sprinkle in coarse salt and freshly-ground black pepper, add a few branches of thyme and /or a few sprigs of rosemary. Then line the bottom of the baking dish with the tomatoes, slicedside down. Don't be bashful; it's ok to really pack them in.

4. Peel and slice 3 or 4 garlic cloves, slice them in half lengthwise and tuck them between tomatoes. Springle the tomatoes with a bit moe salt and a small sprinkling of sugar (less than 1 teaspoon) and add a few bay leaves.

5. Bake the tomatoes in a 350 degree oven until they are soft and cooked throughout (a paring knife should pierce them easily), which should take at least 45 min.

6. Once they're soft, remove, remove them from the oven and let stand until room temperature. You can scrape the tomatoes and jucies and herbs into a container and refrigerate them for up to 4 or 5 days or use them right away. They will actually improve as they sit.

7.Use them to toss into pasta, slightly chopped, pizza or to start a tomatoe sauce.


Tuesday, July 24, 2012

Children hard at work too.


Hello! It’s Annie from the Big Ugly Community.

Our Summer Camp children have been very busy this week. Their gardens are doing very well and some of the children are very amazed at the results they are seeing. Bob Baber attended our Summer Camp and taught an art class. The children learned how to make murals and they turned out great! They are being displayed at the Community Center.

The week of July 16th was Music Camp for our children. They learned how to play different musical instruments and write songs. On Friday the children showed off their talent by performing for their parents and the community. They did an extraordinary job and we are so very proud of them.

David Roberts from the WV University Extension for Families & Health came to the Community Center and held a workshop for Grow Appalachia on canning. We learned how to can green beans. He also shared a delicious recipe for peach and apple salsa. We learned a lot, and we thank you Mr. Roberts.

We finally received some much needed rain and it is really showing in our gardens. I now have tomato plants that are five feet tall! The cherry tomatoes fall off the vine when I walk by. Wow! They are delicious! I have visited several gardens in our community. I am impressed with what I have seen; beans, peppers, potatoes, cucumbers, broccoli, carrots, and more! Everyone is so excited and love that they have others to share their experiences and results with.


Monday, July 23, 2012

Sunflowers!

Grant Barto, one of our friends from the Appalachian Early Childcare Center, gets excited as his Grow Appalachia sunflower bursts into bloom.  Grant got sunflower seeds like the rest of the daycare kids when we shared songs and stories of gardening with them a few weeks ago.

Jammin' to the Oldies - Cowan Community Center


       This past week Grow Appalachia participants came together at the Cowan Community Center to learn safe and tasty jam canning practices from our resident canning expert, Liz Ison.  Many women, and a husband and son, showed up early in the morning to take on mountains of peaches, strawberries, raspberries and wine berries (a special berry picked by one of our friends up at the Letcher County Extension Office).  With the peaches, raspberries, and strawberries, we made traditional canned jam, setting up an assembly line once our fruit/pectin/sugar concoction was all boiled to put it all in jars and seal them up.  With the wine berries however, we made freezer jam.  The jam was essentially made the same way as canned jam but instead of canning it, we put it in freezer safe plastic containers which can be kept in the freezer and removed whenever you are in the mood for some biscuits and jam.

       In just over three hours, our group made sixty-some jars of jam, sending it home with everybody who came to help and distributing it to some of our older and less mobile participants up and down Cowan.  In addition, everybody who came by got to take home some pectin, jars, and biscuit formula so they could recreate our enormous production in their own kitchens.  One of our participants brought back supplies for her daughter to make peach jam with; she said that her daughter had several children who would love to help out with the canning process and speed things up for her.  Many hands do make light work, as we discovered that day!

Nell Fields
         One of our less sugary treats for the day was the chance to hear Nell Fields speak to the group.  Nell Fields works with a local non-profit called Faith Moves Mountains, which works primarily through the established church communities in Letcher County to implement healthful living programs.  Part of a partnership with the University of Kentucky, heir programs aim to research and understand how Kentuckians make decisions about their health, and to encourage healthier decisions.  The three main programs in operation now seek to address three things: smoking cessation, cancer screening, and healthy energy-balanced lifestyles.  Nell spoke to us primarily about smoking cessation, and the programming that Faith Moves Mountains has available to individuals who are interested in quitting.  Through the Cooper Clayton Smoking Cessation program, individuals have free access to motivational videos and patches, and Nell advocated the health benefits of attending these lectures and quitting smoking, and offered the resources of the organization to anybody who had a desire to stop smoking.  It was lovely having our very own participant spread the word about available resources to improve health in the county in a setting that was comfortable, intimate, and casual.

To learn more, go to their website!  Faith Moves Mountains

Salsa at the Breaks Interstate Park

Cowan Community Center - Salsa on the River!

Follow the link above to see our first video, featuring hiking, a beautiful river, and some delicious, homemade, Grow Appalachia salsa!

GARDEN VISITS

Hi, this is Marsha from the Project Worth/Grow AppalachiaGardening program.  My husband, Alex and I spent the last week visiting all the other gardens in our program.  Some were small and some were large.  There were as many different types of gardens as there were families.  Most of the gardens were very lovely and producing.  Some of our gardeners were disappointed in their yield due to the hot, dry weather we have been having for the past few weeks.  We have had some rain lately, so, we hope that things will be better for our gardens. 
                                                                                             
We took a lot of pictures of the gardens.  We plan to share some of these pictures with you on the blog.  Garden plants are many different colors, sizes and shapes.  I enjoy looking at them and taking pictures of them.  The participants are proud of their gardens and seem pleased to show them to us.


One of the gardens is especially beautiful and unusual.  The gardener placed horse manure and hay on the ground in the fall and then planted in it in the spring.  He didn’t even use a tiller or plow.  His garden had paths to each crop.  He has all colors of plants in his garden.  He has rocks stacked to make sculptures of sorts to make the garden more pleasing to the eye.  He is very proud and pleased with his garden and has told us to come to look at any time.  He is growing beans, potatoes, garlic, polk, ginseng and many other crops.  I was very impressed with his work.

Please find below photos of the gardens we visited this week.


April Clifford's Garden

April Clifford's Garden

                                                                         
                          April Clifford' Garden

 
Hackney-Simmons Garden Garden

                                                    Hackney-Simmons Garden Garden

                                                                     
                                           Hackney-Simmons Garden Garden

 
Lyndon & Rachel Chaney's Garden

                                                  Lyndon & Rachel Chaney's Garden

                                                                          
                                                Lyndon & Rachel Chaney's Garden

 
Patty Johnson's Garden

Patty Johnson's Garden

                                                                        
                                                 Patty Johnson's Garden
 
Willie Slone's Garden

Willie Slone's Garden

                                                                         
                                        Willie Slone's Garden
 
Jerry Redden's Garden

Jerry Redden's Garden

                                                                     
                                         Jerry Redden's Garden

I hope you enjoyed viewing these photos as much as we enyoyed taking them.  This week's recipe is listed below.  Hope everyone has a great week in their garden.

Parmesan Potatoes

4 medium potatoes (with skins), thinly sliced
1 small onion, thinly sliced and seperated into rings
3 tablespoons butter, melted
1/4 cup grated parmesan cheese
1/4 teaspoon salt
1/8 teaspoon black pepper
1/8 teaspoon garlic power or garlic bulb chopped fine

Place half the potatoes in a greased, 8"x8" square baking dish.
Top with onion and remaining potatoes; drizzle with butter. Sprinkle with Parmesan chees, salt, pepper and garlic powder. Bake uncovered, at 450' for aprox. 25-30 minutes or until the potatoes are golden brown and tender.
Makes 4 servings.

Gloria Williams

Note:  I submit these recipes as given to me.  Please feel to substitute healthy ingredients whenever possible.  Please be sure to let me know what ingredients you would substitute.