Showing posts with label Pine Mountain Settlement School. Show all posts

Friday, October 19, 2012

Sweet Sorghum of Pine Mountain~ Kathleen Powers


Maggie presses the cane with
 the help of GA participants
   This year, with the supervision of one of our very knowledgeable Grow Appalachia participants, we grew a crop of sweet sorghum at the Settlement School. Given that, (1) we were a bit late planting our sorghum, (2)we planted it in the wettest part of the garden, and (3)we neglected to keep it well weeded and thinned out, we were a bit worried that it wouldn't fully mature and that our efforts (or lack thereof) would be for naught. Luckily, we let the sorghum do its thing and by early October we had cane that was ready to be harvested and processed into syrup! At our fall harvest festival we pressed the cane and started the process of boiling down the juice, in the end we came out with one delicious quart of sorghum!

Our quart of sorghum!
   Sorghum is a crop that has been traditionally grown in Kentucky as far back as the mid 1800’s, Kentucky is now one of 8 states in the southeast and Midwest producing 90% of the United States total sorghum output. Sorghum is a great crop for many Kentucky farmers because it does well in the loam and sandy loam soils that are common in the state. Another ease of growing benefit is that sweet sorghum does NOT require high amounts of organic matter to produce a good crop for syrup. One of the greatest benefits of growing sweet sorghum is its value of about $2000 per acre. Sweet Sorghum as a cash crop is a great example of how keeping it local can really work; most sorghum growers tend to be small producers who see their crop from seed to syrup, and then to a local market; the work and profit of growing sorghum stays within the community and directly benefits those who put the work into producing it. Sorghum is definitely not something that you see filling grocery store shelves identified by the labels of numerous large commercial companies, I for one had never tasted (or heard of) sorghum in my life before coming to KY. 

Seed heads from the sorghum cane
   Sweet sorghum is just one of many varieties of sorghum grown in Kentucky. Sorghum crops can also be used as grain and forage feed for animals, as an ethanol/biofuel source, the grain can be ground into a gluten free flour for cooking and baking, and even popped like popcorn, who knew sorghum was such a versatile crop!

And a couple pictures from the fall harvest festival!
Pumpkin carving
mmm pumpkin guts

Friday, October 12, 2012

Grow Your Own and Avoid Toxic Chemicals! ~Pine Mountain, Maggie Ashmore

I absolutely love my job and love Grow Appalachia. Grow Appalachia is a wonderful program that helps hundreds of families throughout Central Appalachia gain the supplies, knowledge, and physical assistance necessary to grow abundant gardens full of nutrient dense, fresh food. While saving families money on grocery bills and allowing families to increase their intake of fresh vegetables is impressive in itself, Grow Appalachia sites constantly provide anecdotal evidence that the program also brings neighbors together, strengthens communities, and improves mental health. If that isn't enough, the program may also be decreasing families’ exposure to toxic chemicals found in food packaging! Wow!

Deb Callahan's Chow Chow

 During our Tuesday Grow Appalachia meeting we welcomed Melinda Alcorn, Community Educator for the Safe Foods Project to present on the hidden dangers of packaged food. Melinda guided us through a discussion on BPA (Bisphenol A) usage by food companies.

What is BPA? BPA was originally manufactured as a synthetic estrogen. It is currently used to harden plastic and as a protective barrier against metal corrosion and bacteria in canned foods.

What’s the big deal? Studies have found that BPA has leached into the food in 92% of cans found in the grocery store. BPA is an endocrine disruptor that affects how hormones carry messages throughout our bodies. Even low levels of exposure have been linked to breast and prostate cancer, infertility, diabetes, thyroid disorders, early puberty, and even attention deficits and behavioral problems. BPA is also an obesegen, which changes precursor cells into fat cells and changes metabolism rates so we accumulate more calories instead of burning them.

Where is BPA  found? BPA can be found in many products, such as DVDs, receipts, pop cans,  re-usable water bottles, baby bottles, and Sippy cups. BPA is predominately found in the plastic linings of cans used to store food. Fortunately, many companies are phasing out BPA use in re-usable water bottles, baby bottles, and Sippy cups (look for the label “BPA free”).

What can we do to avoid BPA?
1.   Eat fresh food! This is where Grow Appalachia shines again! By growing our own food and preserving it ourselves for the winter we are lowering our exposure drastically.
2.   Purchase dried beans rather than canned and frozen produce rather than canned.
3.   Pay attention to the type of plastic you are buying. Check on the bottom of containers for the recycle symbol. Inside the symbol there should be a number. Plastics numbered 1, 2, 4, and 5 are better. Avoid #3 (PVC), #6 (polystyrene), and #7 or “PC” (Polycarbonate). #3 and #6 do not contain BPA, but are still more toxic than the other numbers. Click here to learn more about what recycling codes tell us.
4.   Purchase items packaged in glass or aseptic multi-layer boxes.


For more information about BPA read the No Silver Lining Report or the Kentucky Safe Foods Fact Sheet. For more information about the Kentucky Safe Foods Project please visit the Toxics Free Future webpage.


Friday, October 5, 2012

FALL HARVEST CELEBRATION! ~ Pine Mountain

Grow Appalachia sites, participants, family, and friends, it is officially autumn and the gardening season is slowing down, so join us at Pine Mountain on October 13th to celebrate a successful season with an afternoon of good food, great company and fun fall activities!


I know you all love to showcase the food you grow and we would love to see and taste it, so bring a dish made with ingredients raised, harvested, or collected locally to share with us all. There will be a local foods potluck, pumpkin carving, a sorghum stir-off, apple cider press, corn hole, and more!


Fall Harvest Celebration
Saturday October 13th
12 pm at Pine Mountain Settlement School

Contact Maggie or Kathleen for more information or directions at 606-558-3416

It's not a party without the people and everyone's invited, so come on out and celebrate the season with us!

Friday, September 28, 2012

Butternut Squash: A Beautiful, Healthy, and Delicious Meal~Pine Mountain, Maggie Ashmore


I love butternut squash, and it seems that our Grow Appalachia participants are coming to love this nutty flavored, versatile squash as well.

Chris Hockenberry with one of his many wheelbarrow loads of Butternut!
I am a huge fan of all things winter squash. I love that winter squash can be stored for long periods of time without refrigeration, and the fact that that winter squash can be made sweet or savory depending on the cooking method. There are endless varieties of winter squash available in seed catalogs, but the good ole butternut squash has won my heart.

The vibrant orange color of butternut flesh shows just how vitamin packed this squash is. Butternuts are good for heart health due to their high dietary fiber content, folate levels, and carotenoids. The potassium levels in butternut are great for bone health, and the amount of vitamin B6 found in the fruit helps to support nervous and immune system function. On top of all this, butternuts promote vision health with beta carotene, and contain massive amounts of vitamin C.

Scooping seeds during the healthy cooking workshop
If the health benefits aren’t enough, butternut squash is absolutely delicious and easy to cook. One of the most annoying parts about preparing any winter squash for cooking is removal of the seeds. One of my good friends, Eliza Hudson, showed me a wonderful trick that makes this step painless and quick. After cutting the butternut in half (and peeling if need be), use an old canning jar lid to scrape out the seeds. I know this doesn’t sound all that exciting, but believe me – it is amazing. Please try it.

Butternut squash is a food that can either be prepared for use in fancy dishes, or simply roasted in the oven. Both preparations will yield yummy results. I will share two simple ways to prepare the squash.

1.   Slice in half, rub with olive oil or a little butter and roast in a 425°F oven for about 45 minutes, or until tender. Remove from oven and let sit until cool enough to handle. Scoop out the flesh easily with a fork or spoon. Season flesh however you like (sweet with butter, sugar and cinnamon, or savory with butter and sage or thyme, etc.). I love the taste to sage with winter squash.

2. Peel squash and remove seeds. Cut into 1 inch cubes. Toss cubes with olive oil. Roast in a 425°F oven until tender. Serve with sautéed onion, garlic, sage, corn, or any other vegetable of your choosing.

Last fall one of our fabulous participants gave Kathleen and me about 2 bushels of butternut! (I know that I am one of the luckiest girls in the world, because I often return home to beautiful produce on my porch!) With all of this butternut at my disposal I began trying all kinds of recipes. I enjoy using Martha Stewart’s recipes. They are easy to follow and almost always turn out well. Her website also allows you to search by produce type and then flip through 30-100 different recipes featuring the produce you want. Try searching her butternut recipes.

My favorite butternut recipes from her site are Butternut Squash with Sage Lasagna, Butternut Squash with Sage, Butternut Bisque, and ButternutSquash Soup. Since our participants are beginning to harvest Shiitake mushrooms from logs we inoculated during our March workshop I think I will have to try the whole wheat pasta with butternut squash, beet greens, and shiitakes next!


Friday, September 21, 2012

An Appetizing Autumn Meal: Bon Appetit! ~ Pine Mountain, Kathleen powers


Roasted carrots and parsnips
This past Tuesday we had our second healthy cooking workshop. Once again we collaborated with the wonderful Jenny Williams who led the workshop and introduced us to some great new ways to prepare fall produce. Our turn out was not as great as we had expected but those who attended definitely got their  moneys’ worth, seeing as Jenny is always fun to listen to and is a great cook as well.
First on the agenda was to introduce participants to some new ways to prepare fall produce. Jenny sliced and roasted beets, carrots, parsnips, and a butternut squash while Maggie tore up fresh kale and mustard greens to make a roasted fall vegetable salad. While the veggies were roasting Jenny taught us how to make a rubbed kale salad (you simply pour a little olive oil on your greens, kale and mustard for us, sprinkle a little coarse salt over it all and massage the greens for several minutes to tenderize them, no cooking involved!) which is as easy as can be. The salad came together quickly, roasted veggies topped the greens and then it was finished off with a homemade honeyed cider vinaigrette, and oh my was it ever delicious!
Maggie and Jenny prepping veggies
Next up were a couple of pizzas using tomatoes and herbs from the garden. Many of our participants have been dehydrating tomatoes this summer so we wanted to cook something that would include these delicious slices, and pizza was the perfect thing. We also had many participants growing herbs this summer, but they had no idea how to incorporate them into their cooking, so we decided to top our pizzas with some tasty basil pesto, really who can resist fresh pesto? Maggie made our pizza crusts with her go to quick and easy whole wheat dough recipe and we topped them with several variations of the tomatoes, pesto, and cheeses.
        Last on the menu for the night was a second preparation of beets called rubies and pasta. Beets get such a bad name and are disliked by so many people, but Maggie and I are both staunch believers in the amazing deliciousness of beets, so we set out to try to change at least a couple of non beet believers and I think we may have been successful thanks to this dish! Rubies and pasta, a classic Italian dish, was completely new to me, so I was interested to see how it would turn out. Jenny roasted several more beets chopped them into small chunks, cooked them with a bit of garlic, olive oil, and red pepper, mixed them with pasta, garnished it all with some fresh basil and left us all with mouths watering, ready to eat.
So we all sat down to enjoy our meal (salad, pizza, pasta, and zucchini cake to top it off, really who can complain about that!) and to talk about fall gardens, food preservation and the many other fun conversations that a good meal can bring about. All in all I think we all learned something new and went home excited to try out some new recipes, I know at least I did!


Maggie is ready to eat!


A big thanks to Jenny once again for her great skill and enthusiasm! Here are a couple of the recipes from the workshop:


Basil Pesto


Pesto is great on pizza, pasta, warm bread, mixed in scrambled eggs etc. Pesto can also be frozen in large batches or if you wish to have individual servings pour pesto into an ice cube tray, freeze completely, then put individual “pesto cubes” in one freezer bag and you can thaw just as many as you need at a time.


Ingredients:

Coarse salt and ground peppers
1 garlic clove, peeled
3 packed cups basil leaves
1/4 cup toasted pine nuts 
1/2 cup extra-virgin olive oil
1/4 cup freshly grated Parmesan

Directions:
On a cutting board, sprinkle 1/4 teaspoon salt over garlic and roughly chop. Using a flat side of the knife blade, crush mixture into a thick paste. Add to a food processor with pine nuts, basil, and 1 tablespoon oil. Pulse until ingredients are finely chopped. With machine running, add remaining oil in a slow, steady stream. Add Parmesan and pulse to combine. Season with salt and pepper.
Use walnuts or pecans for the pine nuts. You can also replace half the basil with arugula or parsley. Or try cilantro along with pumpkin seeds.


Easy Whole Wheat Pizza Dough

Pizza w/ dried tomatoes and pesto
Ingredients:
2 ½ teaspoons (one packet) dry yeast
1 cup warm water
1 teaspoon sugar
1 Tablespoon olive oil
1 cup all-purpose flour
1 cup whole wheat flour

Directions:
Combine dry yeast, sugar, and warm water in large bowl. Whisk to combine. Let sit for a few minutes until mixture becomes bubbly. Mix remaining ingredients together with water and yeast. Knead for a few minutes on a lightly floured surface. Place in an oiled bowl and cover. Place dough in a warm location and let rise until doubled in size (roughly 45 minutes). Knock down dough with a fist and let stand for 10 minutes. Spread onto a baking sheet and create a pizza!


Roasted Root Vegetable Salad with Honeyed Cider Vinaigrette (serves four)


The Salad

Ingredients:
2 beets
2 parsnips
1 small acorn or butternut squash
4 cups of greens – any sturdy lettuce will do, but endive is good if you can find it, or arugula, or even very small, tender kale, turnip greens, or mustard greens
2 TBS olive oil
Salt and pepper to taste
Chopped, toasted walnuts, pumpkin, or squash seeds to garnish

A beautiful salad
Preheat oven to 450°. Peel vegetables and slice thinly – about a quarter inch. Toss with olive oil to coat and spread in a single layer on a sheet pan covered with parchment paper or foil. Sprinkle with salt and pepper to taste. Roast until vegetables start to brown around the edges, then use a spatula to lossen vegetables from pan and flip over.
Meanwhile, clean and dry greens and tear into small pieces. Toss with 2 TBS of dressing and arrange on a platter or individual plates, Pile roasted vegetables on greens and drizzle with more of the dressing. Top with toasted nuts or seeds and serve.

Honeyed Cider Vinaigrette

Ingredients:
1/3 cup cider vinegar
2 TBS honey
½ Tsp kosher salt
¼ Tsp pepper (Aleppo or cayenne add a nice kick)
2/3 cup olive oil

Whisk all ingredients until smooth and thick. Serve with greens. 

Rubies and Pasta (serves 4)

Ingredients:
2-3 beets
Pink pasta!
4 cloves garlic, finely chopped
1 lb pasta
2 TBS olive oil
Parmesan cheese to taste
Aleppo or red pepper flakes to taste
Chopped parsley and or basil to taste (about 1 cup total)

Roast beets in a 450° oven by placing them in a baking dish with about a half inch of water and covering the dish tightly with foil. Roast until fork tender, about 45 minutes to 1 hour, depending on size. Let beets cool until you can touch them, then slips the skin off. Cut the beets into half inch chunks and set aside. You can do this up to 3 days in advance. Refrigerate beets if you are not using them immediately.

Cook pasta according to package directions and then drain, reserving ¼ cup of cooking water. In a skillet or pot large enough to hold pasta and beets, heat the olive oil. When the oil is shimmering, add the red pepper, garlic, and chopped beets. Stir until garlic has softened , but not browned, and beets are heated through. Stir in cooked pasta, and add the reserved cooking water a tablespoon at a time of pasta is too dry. Remove from heat and top with chopped herbs and parmesan cheese.

I hope all you blog readers will give these delicious recipes a try if you find yourself with some fall produce and an appetite, happy cooking!


Friday, September 14, 2012

Saving Seed: Good for your Budget, Good for the World~ Pine Mountain, Kathleen Powers


    Whether or not you can it believe September is in full swing and the tempo in the garden is greatly reflecting that. Days have been spent pulling up corn, and tomatoes, clearing out summer squash plants, and tearing down bean vines. Yesterday I spent 2 hours sitting on a bucket in a bean patch by myself picking seed bean off spent vines , next week I will probably do the same for another 2, 3, maybe even 4 hours. Why should you care that this is the way I’m spending my days? Because saving seed is an important aspect of building community agriculture and a significant step in working towards self sufficient locally driven food economies.

    Why is saving seed so important? Well I wrote a bit more in depth about it in a post earlier this year, but some of the most important reasons for saving seed include that the practice saves money, promotes sustainable gardening, helps ensure seed that is well adapted to regional growing climates, and protects the “bank” of heirloom seeds in circulation. As many large companies take over the sale and distribution of seed to growers, crops become more genetically uniform and the risk of losing vast amounts of crops in one fell swoop of disease becomes much greater. If no one took the time to save seed we could easily loose many types of crops that we know and love and that have been passed down through many generations of small farmers and gardeners throughout the U.S.

Here are 2 videos that address that larger importance of saving seed for a healthy world:


Thankfully saving seed is quite easy!

This PDF is a great guide to saving seed from the crops of most small farms and gardens:


This link will take you to a great diagram that we came across in the Baker Creek Heirloom Seeds catalog for saving tomato seeds, we as well as some of our participants have tried the method out and it works wonderfully!:

Here are 3 more organizations focused on seed saving that have some great resources:


If you are looking to get your garden started with some heirloom seed, or if you just enjoy learning about seed saving and the seeds of Appalachia attend this great annual event:

Bill Best of Sustainable Mountain Agriculture Center
Seed Swap and farm tours
Saturday, October 6th
1033 Pilot Knob, Cemetery Road
Berea, KY. 40403

Find out more about SMAC at http://www.heirlooms.org/index.html

Friday, September 7, 2012

Late Summer Peppers ~ Pine Mountain, Kathleen Powers


     Despite the tough growing conditions this summer it seems that many gardeners are getting a good late summer pepper crop, we have recently been seeing lots of pretty bell peppers, sweet banana peppers, hot green peppers, bright red jalapenos, and more!
    Many gardeners in Grow Appalachia grow peppers and I’m sure they have just as many wonderful ways to prepare them, however I know how easy it is to get in a rut with the way you use your fresh vegetables, and then before long you just get fed up with them all together. Peppers are easy to preserve (just chop them any way you want and stick them in the freezer), and this is always an option if you find you just can’t eat any more this summer, but there are also many delicious and relatively simple ways to prepare them fresh from the garden.

Maggie with some of the gorgeous
peppers given to us by GA participants
     My favorite way to eat bell peppers is simply to roast them on high heat and eat them; hot, cold, in pasta, on sandwiches, mixed with other fresh produce (corn, tomatoes, onions, etc.), or just by themselves.
      
Roasted bell peppers
1. Cut peppers into large chunks (slice 1 pepper into quarters), remove seeds and ribs.

2. Coat peppers generously in olive oil and spread on a tinfoil lined baking sheet.

3. Roast in a 425° oven for about 45 minutes (just keep on eye on the peppers and take them out when they are a bit blackened and quite soft).

4. After they have roasted put them in a sealed container for 15 mins. Once they are cool enough to handle slip off the skins and discard them (I don’t bother with this step, I think the blackened skin actually tastes good).

Roasted peppers will keep for several weeks in a sealed container in the fridge, or you can freeze them for later use!
Dried Cayennes also make
for great kitchen decor
Hot peppers can be roasted and added to many dishes, they can also easily be frozen, canned, or strung and hung to dry.

  • Last year Maggie made a great Jalapeno pepper jelly, this link is the Ball Blue Book recipe reposted by a food blogger.
  • You can also find many recipes for salsa, hot pepper sauce, and relish that use up lots of hot peppers.
So enjoy your peppers this summer (fall, already?), and if you have any great pepper recipes let us know, we always love to try something new!

Tuesday, September 4, 2012

For the Aubergine Fiend……, and those so Inclined to try something new! ~ Pine Mountain, Kathleen Powers


   Eggplant (also known as aubergine) may seem like an odd topic for a blog post, I mean really how much can you write about eggplant. But that’s exactly why I’m writing this blog, I feel that eggplant deserves more attention than it gets. A lot of our gardeners are growing eggplants but have no idea what to do with them once they are harvested, or in some cases, they don’t even know what those strange purple vegetables are that they are growing. I have already been given eggplant from several participants this summer because they have no idea what to do with it, they just wanted to see what it was and how it grows (which is good enough reason for me, but if it was being eaten as well that would be even better).
   Eggplant is a member of the nightshade family along with potatoes, tomatoes, sweet peppers, and more.  Eggplants contain a host of vitamins, minerals, and phytonutrients, they are high in dietary fiber, contain high values of bone building manganese and heart healthy potassium. Eggplants also fall in the category of fruits and vegetables that is beneficial for the brain/memory, urinary tract health, and general healthy aging, what more could you want!?
   So why don’t more people love eggplant? Well eggplant is probably best described as having a spongy and bitter texture, which makes it sound completely unappetizing. However, with a little extra care and creativity eggplant can be made into a delicious meal. The first step in many preparations of eggplant is to sweat the eggplant (sprinkle salt on sliced eggplant and let it drain for several hours) or to soak it (soak sliced eggplant in milk in the fridge overnight). Both of these steps will help to take away the bitter taste of eggplant that so many people dislike (some preparations of eggplant will not require this, but if you are following a recipe it will give you all the details!). Once you have your eggplant sliced and de bittered there are many ways you can prepare it, everything from simple grilling or roasting to blending it into dips, topping pizza, pan frying, or making cakes!

Here are a few recipes that I love

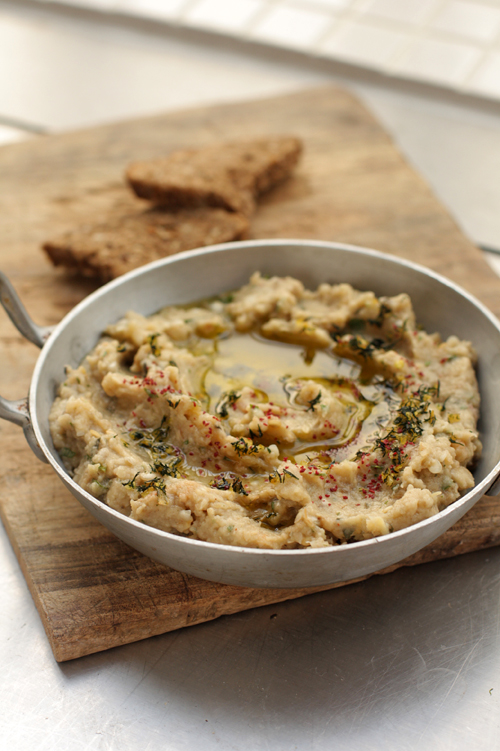
Recipe: Sautéed Eggplant with Honey and Thyme (aspicyperspective.com)
Ingredients
Delicious eggplant with local honey
and thyme from the garden
  • 1 large eggplant
  • 2 cups milk
  • ½ cup flour
  • 3-5 Tb. olive oil
  • 3 Tb. honey
  • 2 Tb. fresh thyme leaves
  • Sea Salt
Instructions
  1. Peel the eggplant and slice it into thin 1/8 inch rounds.
  2. Place the eggplant slices in an airtight container and pour the milk over it. Cover and refrigerate overnight.
  3. In a small pie pan, mix the flour with 1 tsp. salt. Heat 2 tablespoons of olive oil in large skillet over medium-high heat. Line a plate with paper towels.
  4. When the oil is hot, dredge a few slices of eggplant in the flour and tap off the excess. Gently place them in the skillet and pan fry for 2 minutes per side. Remove and place on the plate to drain.
  5. Repeat with the rest of the eggplant, adding oil to the skillet as needed. Sprinkle the slices with a little more sea salt as they come out of the skillet.
  6. Serve warm, drizzled with honey and sprinkled with thyme.

Baba Ganoush is a dip that is very similar to hummus; it can be used on raw veggies, crackers, pita bread, as a pizza topping or sandwich spread among other things.

Baba Ganoush (davidlebovitz.com)
 3 medium-sized eggplants
1/2 cup (130g) tahini (sesame paste)
1 1/4 teaspoons coarse salt
3 tablespoons freshly-squeezed lemon juice
3 cloves garlic, peeled and smashed
1/8 teaspoon chile powder
1 tablespoon olive oil
a half bunch picked flat-leaf parsley or cilantro leaves
1. Preheat the oven to 375F (190C).
2. Prick each eggplant a few times, then char the outside of the eggplants by placing them directly on the flame of a gas burner and as the skin chars, turn them until the eggplants are uniformly-charred on the outside. (If you don’t have a gas stove, you can char them under the broiler. If not, skip to the next step.)
3. Place the eggplants on a baking sheet and roast in the oven for 20 to 30 minutes, until they’re completely soft; you should be able to easily poke a paring knife into them and meet no resistance.
4. Remove from oven and let cool.
5. Split the eggplant and scrape out the pulp. Puree the pulp in a blender or food processor with the other ingredients until smooth.
6. Taste, and season with additional salt and lemon juice, if necessary.

Storage: Baba Ganoush can be made and refrigerated for up to five days prior to serving.


This recipe I have not tested, but I have eaten eggplant cake before, and it is delicious!

Eggplant Cake

1/2 c. butter
1/2 c. sugar
1/2 c. honey
2 eggs
2 c. grated eggplant
1 c. white flour
1/2 c. whole wheat flour
1/4 tsp. salt
1 tsp. baking powder
1 tsp. cinnamon
1/2 tsp. cloves
1/2 c. chopped nuts
3 oz. cream cheese, softened
1 c. confectioners' sugar
Ground nutmeg (for garnish)

1. Cream butter.
2. Add sugar and honey.
3. Beat in egg, and then stir in grated eggplant, the white flour, the whole wheat flour, the salt, baking powder, cinnamon, nutmeg, cloves, and chopped nuts.
4.  Pour into greased and floured tube pan. Bake at 350 degrees for 1 hour.
5. Cream softened cream cheese until light and fluffy. Gradually beat in the confectioners' sugar. Drizzle on cooled cake, sprinkle frosting with nutmeg.

So give eggplant a try, and let me know what you think!

Friday, August 24, 2012

What to do now? Fall gardening, clean up, and cover crops!~Pine Mountain, Maggie Ashmore


The growing season is beginning to wind down for our main season crops, but it is not time to quit for the season! Now, you might be tired by this time in the season and feel that you already have more than enough food from your garden preserved for the winter, but I believe that the extra push now to plant some fall greens and prepare your garden for the winter will be well worth the effort.  Every season that I have worked with Grow Appalachia, new families experiment with fall gardening and the use of simple season extension strategies, such as row covers. It is exciting to see fresh food long after summer has faded to fall.

Row Covers in use at PMSS during Fall 2009
Home Vegetable Gardening in Kentucky, the publication by UK Extension, gives the planting dates for fall crops on page 15. Another wonderful resource is the Fall gardening guide that Southern Exposure Seed Exchange puts out. Their list includes varieties that are especially suited to fall gardening and lets you know down to what temperature each plant can manage. While Southern Exposure is located in central Virginia, our average first frost date is the same as theirs (October 15) and the planting dates should be similar.   

It's not too late to plant radishes! Look at these beauties Kathleen grew this spring.
This time of the year is also the time to start preparing your garden for the off season. If you aren’t planting a fall garden, or are only using part of your plot for fall crops, it is time to start cleaning the garden. It is important to remove spent plant debris and weeds from the garden area. Removing weeds before they go to seed prevents more weed seed from being added to the plot. Leaving old plants in the garden leaves habitat for insect pests to overwinter and can contribute to fungal diseases if the plants have been infected. Plants that are bug ridden or diseased should be hauled off in the trash or burned – NOT COMPOSTED.

Once your garden is “clean”, it is time to prepare for next year! Planting a cover crop is one of the best ways to improve your garden for next season. I am huge fan of cover crops, and each year more of the families in the PMSS Grow Appalachia project become fans as well. Last season I posted about cover crops  and Jessica at BDVP has also sung their praises . Many plants can be used as a cover crop, as you can read in my post from last season, but the three I have used the most with Grow Appalachia are Crimson Clover, Rye, and Buckwheat.

Crimson Clover and Field Peas used as a Cover Crop in a PMSS Grow Appalachia garden. Look at those legumes fixing nitrogen!
Crimson Clover: Can kill weeds if planted in early fall, especially if it is planted with oats or rye. Clover is great at increasing the nitrogen content of your soil. Crimson clover grows fast in cool fall and spring weather. Mow down the clover and turn under after flowering (nitrogen fixation occurs then).  Crop seeding rate is 1 lb per 1000ft² broadcast. Or mix 1/3 clover and 2/3 rye or oats and broadcast.

Winter Rye: Rye is a cold tolerant and can germinate in soil as cool as 34-40° F, making it a major fall-planted cover crop. Rye has a well-developed fibrous root system that reduces leaching of soil nitrogen. Plant in September through mid-October.  Broadcast  3-4 lbs per 1000ft². The later in the season you plant rye, the more seed you will need to plant. You may want to broadcast with clover.

Buckwheat: Buckwheat’s rapid growth smothers most weeds.   Buckwheat fits into the “green manure” category of cover crops because of its rapid breakdown which releases nutrients for the succeeding crop and fits into a tight vegetable rotation, such as when a crop is harvested prior to mid-July and a succeeding crop is not scheduled until fall. Buckwheat will be killed by winter weather and is usually not planted as a fall cover crop, but during the summer months to improve soil. The breakdown of buckwheat improves soil structure and moisture holding capacity. If volunteer buckwheat is harmful in the succeeding crop, then the green manure crop of buckwheat should be destroyed before a large number of seeds mature. Buckwheat will germinate at temperatures ranging from 45° to 105°F. Broadcast 2 lbs per 1000ft².

Buckwheat blooming at PMSS during summer 2010

Some of the benefits of cover cropping include:

  1. Improve soil quality: When the soil is allowed to lay bare during the traditional non-gardening months the soil surface seals together and water runs off during rains. Cover crops prevent this sealing of the earth and improve the soil structure. The root establishment over the winter months improves air and water infiltration into the soil, as does the decomposition of the organic matter after it is turned under. Earthworms and other soil organisms also thrive while the plants are decomposing.
  2. Erosion Control: Cover crops hold the soil in place during the late fall, winter, and early spring thus reducing erosion due to wind and water coming into contact with the bare earth.
  3. Increase soil fertility: Legume cover crops add nitrogen to the soil from the atmosphere due to their associations with nitrogen fixing bacteria. Non-legume cover crops can recycle excess nitrogen, phosphorus, and potassium from the previous crop to the following crop. Why not try this instead of using the synthetic N-P-K fertilizer next spring?! When cover crops are turned under and allowed to decompose they slowly release the nutrients that they have taken up. This will add some micro nutrients not usually added to the soil through traditional fertilization plans.
  4. Suppress weeds: A dense stand of cover crop will reduce the amount of weeds that germinate in the fall due to shading. Some cover crops also release chemicals into the soil that will suppress other plants (weeds).
  5. Insect control: Beneficial insects may be attracted to cover crops plantings, such as lady beetles or ground beetles that eat pest insects. Flowering cover crops will also attract beneficial insects
  6. Subdue soil diseases and pests: Cover crops support beneficial soil microbes that can work against soil diseases and pests. Some cover crops may also produce compounds that suppress these problems. 


Friday, August 17, 2012

A Tasty New Way to Prepare your Plots: Lasagna Gardening ~ Pine Mountain, Kathleen Powers


     Sounds pretty good right? Plant lots of tomatoes, eggplant, maybe some spinach…. But cheese doesn’t grow!  And where does the pasta come from? Well lasagna gardening is not in fact about growing the ingredients for a tasty lasagna, but rather, a nontraditional organic gardening method that relies on a layering method called sheet composting.
     One of the greatest benefits of the lasagna gardening method is that it does not require any digging or tilling. This makes it an ideal practice for beginning gardeners, elderly gardeners, or those who simply do not have access to equipment to break ground and work the soil. Lasagna gardening can also be a relatively low cost method of gardening, using recycled and found materials.
     So how does this lasagna gardening thing work? you ask, well I will do my best to give you a rundown of the basics of Lasagna Gardening.
     Though it may not seem like it is already that time of year, fall is just around the corner and soon it will be time to start putting your garden to bed and preparing for the winter. Fall however is also a great time to get started with new garden plots for the next season because there is a bounty of organic material available and the winter months will allow ample time for your organic material to break down and leave you with a ready to plant plot by the time spring arrives.
Two garden plots ready to decompose through the winter

Step 1: Choose your garden area and put down a layer of cardboard over the entire area, make sure to overlap the cardboard so that no weeds or grass can creep through the cracks. Then thoroughly wet down the cardboard so that it will stay in place. You do not need to till/dig up the garden space at all because the cardboard will kill all grass and weeds and slowly break down the dense top layer of soil.

Step 2: Put down your first “lasagna” layer on top of the cardboard. This layer should be 2-3 inches thick and made up of water absorbent material such as dead leaves, straw, peat moss etc.

Step 3: Add a second layer made up of greener material, such as grass clippings, veggie scraps, garden trimmings, etc.

Step 4: continue to add layers alternating between green and brown until your garden spot is covered with layers that are about 2 feet in height. Layers can be made up of just about any organic material such as leaves, grass clippings, manure, compost, coffee grounds, shredded paper, pine needles, etc. Just make sure that you are not adding any diseased garden plants to your piles or you will have future problems. You can also add necessary soil amendments such as lime and wood ash to the layers to get a head start on a healthy garden.

Layers of a lasagna garden
Step 5: leave it all to decompose over the winter months. By the time you are ready to plant in the spring the layers will have reduced in height to just several inches of loose rich soil.

Step 6: Planting! When you are ready to plant simply dig down as deep as necessary in the soil and plant to your heart’s desire.

Step 7: Once you have planted it is very helpful to apply a layer of mulch to the entire garden. This will keep weeds to a minimum and help the soil retain water. Mulch can be made from straw, grass clippings, leaves, shredded paper, etc.


Benefits of Lasagna Gardening/Sheet Composting
• No tilling, digging, or large equipment necessary
•Few weeds will grow if you properly mulch
•Low cost
• Nutrient rich soil

Patricia Lanza is the gardener who conceived of the lasagna gardening system as I have described, here is her first book on the topic and an article written by her that you can access online:

Lasagna Gardening: A New Layering System for Bountiful Gardens, No Digging, No Tilling, No Weeding, No Kidding!  By Patricia Lanza

http://www.motherearthnews.com/Organic-Gardening/1999-04-01/Lasagna-Gardening.aspx