Friday, September 30, 2011

Shiitake Mushroom Logs: a Food, Health, and Home Gardening Revolution-- Pine Mountain, Kathleen Powers

            I have bad news for picky and adventurous eaters alike, mushrooms, which are so commonly shunned as a strangely textured and  flavorless food, are so chock full of health and environmental benefits that, in my opinion, those who insist on picking them out of their food should probably give mushrooms a second chance, and a third or fourth if necessary.
      Shiitake mushrooms are an edible type of fungi that have long been valued for their medicinal uses and now are becoming a more common ingredient in American cooking. Shiitakes boast countless health benefits, including that they are a good source of iron, strengthen the immune system, and are good for the cardiovascular system. Shiitakes have even been found to help protect against the development of cardiovascular disease.
                Not only are shiitake mushrooms an acclaimed super food but they are also an easy and sustainable source of food to grow. Shiitake mushrooms that you buy in the grocery store are usually grown on blocks made of sawdust and cooked grains. These sawdust logs are kept inside where the mushrooms are grown under controlled settings of temperature, light, air flow, and moisture. Though store bought mushrooms usually taste just fine, there is a much less expensive and healthier way to grow mushrooms that can be done at home!
 Homegrown shiitakes are produced on natural hardwood logs that are injected with mushroom spawn and then kept outside under shade trees so that they are exposed to sunlight, day and night cycles, and natural ventilation. After 6-18 months the logs will begin to produce mushrooms in cycles, usually yielding dozens of mushrooms for a short period of time during the spring and fall rainy seasons. Shiitake logs do not require much maintenance and, given the right conditions, they will continue to produce for up to 4 years.  Shiitake logs can be purchased for about $25 from many different online retailers.
Pine Mountain Shiitake logs
When the shiitake logs here at Pine Mountain began to produce this past week we were inundated with heaps of fresh mushrooms. Because mushrooms don’t stay fresh for long we had to quickly find ways to preserve all our mushrooms. Here are a few ideas of what to do with your bounty of shiitakes!


Want to learn more about shiitake mushroom logs and start your own home production?
Join us in Inman VA for an informative workshop:

Shiitake Mushrooms at Home: Experience a hands-on demonstration and take home your own mushroom log (supplies limited, small cost). Workshop will be held November 5th. To sign up or receive more information visit: www.Samsva.org/garden or call 276-565-6167.

Wednesday, September 28, 2011

Harvest Time at Redbird Mission 2011

As the field worker here at the Redbird Mission site, these last few weeks have truley been the highlight of my experience with Grow Appalachia.Seeing the rewards from all the hard work we as a group have put into the gardens this year has really been fullfilling.

The harvest of self grown fresh produce and the security provided in knowing there is food preserved whether it be canned,frozen,ordehydrated for these upcoming winter months which can be a struggle for some families,is an experience seldom matched. It instills a sense of self pride in families to set thier own food they have grown on thier table and the table of family and friends with whom they have shared, as Appalachian people so often do.These things are definitely what makes makes Grow Appalachia such a wonderful program and a life changing opportunity here in our area.

Last week I was giving the opportunityto attend the Brushy Fork Annual Institute. It gave me the chance to learn skills to enhance my ability to utilize all the recourses that have been provided to me through Grow Appalachia and Redbird Mission.

left to right:Tonya Asher, Johauna Gosney, Chad Brock, Tim Crawford
We have our greenhouse almost completely functional and are anticipating it will have a huge impact on what we will be able to accomplish with Grow Appalachia next year.


Greenhouse at Redbird Mission site

We will now be focusing most of our attention on, fall crops, cover crops and gathering all of our harevest
information together so we can view the impact Grow Appalachia has had on our community and our participants

 Field worker,
Chad Brock

Tuesday, September 27, 2011

Fall Workshops and Gardens in West Virginia

Hello,

   This is Rachel writing from High Rocks Grow Appalachia in Hillsboro, WV.  I was out of town last weekend, and when I returned home I was thrilled to see that Fall has arrived in full force.  The trees are beginning their annual parade of color, and the air smells like crushed leaves.

   As the plants themselves wind down in preparation for winter, so do we here with Grow Appalachia.  Gardens are mostly finished (no) thanks to an early frost, and we are distributing winter rye and hairy vetch as cover crops to our participants.  Several of our larger market growers are still selling lettuce, kale, and other hearty fall crops.  Tomorrow we will have an end of the year celebration potluck, to talk about how this year has been, share garden stories (and the last of the garden food!), and talk about how next year might be different.

   Our last workshop of this season was about Seed Saving and the importance of preserving Heirloom Seeds as GMO Seeds become ever more prevalent.  The workshop was led by two local farmers who have been growing food, and saving seeds in Pocahontas and Greenbrier Counties for years.  We held the workshop outside at the Pearl S. Buck Birthplace Museum.  The Museum is one of our participants and has had one of the most successful gardens in the program this year.  They planted in the historic location of the garden, and were thrilled to learn that even though nothing had been grown there for decades, the soil had been fantastically prepared back in the old days when it was used to feed the Buck Family.


 Sam Arbogast brought with him a slew of seeds he had saved, and gave a detailed description of how to save seeds from a variety of plants.  He explained that his first memories of seed saving come from watching his mother do it, but that as a child he had no interest in it.  It was only years later after Sam returned from the military that he became interested in this.

Sam Arbogast describing how to save seeds.


A Full House of all ages came to learn about this historic gardening practice.

Participants Listen Closely as Evening Draws Near.


Next Mark Gillenwater spoke about the dangers of gardening with GMO seeds and their negative impacts on plants, animals, and diversity of foods. 

All around it was a very successful workshop, and was the best attended of any we've held all year!  Now, we are looking forward to some time to really plan for how to improve the program for next year.  And as we try to can and press as many apples as possible, we are also trying to preserve all of the knowledge we have gained over the past growing season.  It has been quite educational, and a lot of fun!


Thursday, September 22, 2011

When Canning is Just too Much: Dehydrate! -- Pine Mountain, Kathleen Powers

Though fall has officially begun, we are still left with a bounty of fresh garden produce that needs to be preserved. We have canned, cooked, and frozen, yet there always seems to be another basket of something or other that nags at me to find a way to preserve it before it goes to waste. I don’t know about you, but after only 2 rounds of canning I’m just not motivated to pull out the water bath canner and wait for 2 hours for the water to boil, before I even begin the rest of the process. This is where dehydrating enters the picture and puts my mind at ease. Dehydrating is an easy and relatively unintimidating way to preserve your harvest for the winter months, and to create tasty snacks year round. Dehydrating is also good for families who like to buy in bulk, or like me, just can’t say no to a really good deal on that 5 lb bag of apples at the store.  Here at Pine Mountain we have been dehydrating tomatoes, mushrooms, summer squash, herbs, jalapenos, and apples, to name a few. 
Dried Tomatoes

Dehydration Methods

Electric Dehydrators
Electric dehydrators are probably the quickest and easiest way to dehydrate foods yourself and can be purchased online or at many hardware stores for about $35 and up.With an electric dehydrator such as this you can dry just about anything in 24 hours time. There are different ways in which to season and treat specific produce before dehydrating, but with many things, such as tomatoes, you can simply slice, arrange on trays, plug the dehydrator in, and go about your other tasks while it works away.
Oven dehydrating
Oven dehydrating is a much slower process, but if you have an oven, you can easily do it. Your oven must be able to maintain temperatures lower than 200° and you should start the dehydrating process only when you know you don’t need to use the oven for at least 8 hours. To dehydrate foods in the oven you must slice and treat them accordingly and lay them out on baking sheets. Set the oven and leave the door propped open for the entire process.

Suggested Oven Dehydrating Temperatures (Fahrenheit)
Meats and fish: 145° and above
Fruits and vegetables: 130° to 140°           
Herbs and flowers: 100° to 110°

Solar Dehydrator

We are also lucky enough to have a solar food dryer on the campus to use. In the past month we have been drying herbs and flowers from the community garden in it, and it can also be used for fruits and vegetables. The solar dehydrator usually takes about 24 hours to dry herbs, but obviously this is dependent on the weather and the amount of sun it receives during any given day. For those of you who are so inclined you can build a solar dehydrator with simple materials and a guide.


A simple solar dehydrator plan can be found at: www.solarfooddryer.com/Info/Mother_Earth_News_Article.pdf

What to do with dried foods
Reconstitute: Many vegetables can be reconstituted by simply soaking in water until desired volume is restored, they can then be used to cook.

Cook: if you want to skip the soaking process you can simply add dried veggies to soups, stews, casseroles, etc. I am a fan of using dried tomatoes in omelets and pasta dishes. Dried fruits can be used to make pies and other desserts.

Powder: dried herbs and vegetables such as peppers and chilies can be ground into powder once they are dehydrated and stored for seasoning.

Delicious dried apples!
Snack: dried fruits make a great healthy snack, you can eat them as is or make your own trail mix with nuts

You can also make your own fruit leathers and even jerky!


Here is a website with some great dehydrating tips and simple recipes to make use of your dried goods:
http://farmgal.tripod.com/Dehydrate.html

Wednesday, September 21, 2011

Winding down - St Vincent Mission - Gary

We are beginning to wind down for the year. Looking toward next year. We are offering winter wheat to our participants who want cover crops. We are encouraging all to have cover crops. Had a wonderful time at the GA Celebration in London. It was enjoyable to meet some of the other partners. A lot of get food and fellowship. Thanks to all. Hope everyone has a great fall.

Thursday, September 15, 2011

Homegrown Garlic- Pine Mountain, Kathleen Powers

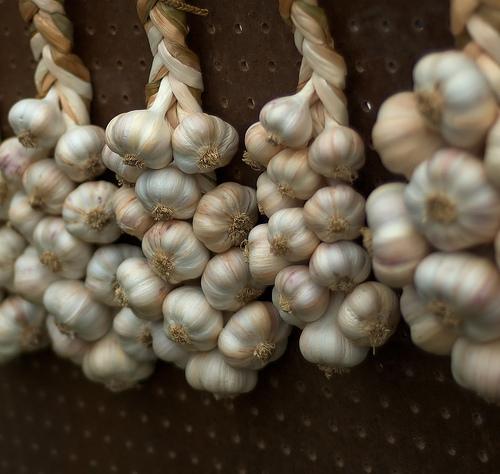
After 22 years I feel that I can now say that I know what truly good garlic is, and being a garlic enthusiast (I put it in everything I cook) this is probably a step in the right direction. Before arriving at Pine Mountain last month I bought all my garlic at the grocery store, and I was content doing so because I thought that all garlic was the same and made just about every food taste better (which is still true). However when I tasted the garlic that my housemate Maggie grew this past year, I was blown away, all garlic is not the same! Compared to what I was buying at the store Maggie’s large bulbs of garlic are fresh, crisp, tasty, and just 10x better all around. Thankfully it turns out that garlic is not at all hard to grow, and fall is the time to order your seed garlic and start planting!

Guide to Growing garlic

Plant garlic by Halloween and harvest by the 4th of July

Soil – Garlic likes slightly acidic, well-cultivated soils with plenty of 
organic matter (compost). Separate bulbs into cloves and plant within
 5-7 days so they don’t dry out. Garlic roots do best when planted
 before the ground freezes to allow for root establishment prior to wintery
 cold temperatures - the ideal soil temperature for planting garlic is 60 degrees.

Planting • Mulch • Water – Plant garlic cloves 2” deep
 (blunt end down) and 4”- 6” apart with 12”- 15” between rows. Mulch garlic with straw or leaves to conserve water, protect young bulbs through winter, and deter spring weeds. Shoots
 will push through the mulch in spring. In summer, pull mulch away from the bulbs. Garlic needs to receive ample amounts of
 water throughout spring and summer, and 
should be kept weed-free.
                                                                 
Harvest • Storage – When the garlic leaves begin to 
turn yellow (late June and into July), stop watering for
 2 weeks and then harvest the bulbs. Make braids or 
bundles of 6-10 bulbs and hang in a dry, shady place to cure
 for 3-4 weeks before storing. Store garlic in a cool, dry, 
well-ventilated place in well-ventilated containers such as mesh bags. Storage life varies from 4 -6 months for hardneck varieties
 and up to 10 months for softnecks.


Garlic Powder: An easy and more dependable
 way to store your garlic is in the form of garlic powder. After letting
 the freshly harvested garlic dry for a few weeks, peel
 the cloves and either: roast the garlic for ½ hour in a 
350° oven and after cooling, place in a kitchen blender or 
food processor, and then dehydrate the paste in the oven or
 dehydrator. Or, dehydrate the peeled cloves and blend them 
once dried. Place the garlic powder in a good glass jar and store 
with your other spices.

Hardneck or Softneck?        
Softneck Garlic is the most common type of garlic. Almost all supermarket garlic is a softneck variety because it is easier to grow and harvest mechanically and keeps longer than hardneck. Softnecks are recognized by the white papery skin and an abundance of cloves, forming several layers around the central core. The flexible stalks of softnecks allow them to be braided into decorative plaits to hang and store. Softneck garlic is a little easier to grow in warm climates like the Southeast.

Hardneck Garlic, also called seedstem or top setting garlic, shoots up a stem or scape in late spring which coils from the top and grows a number of bubils. These are often called flowers although they are not. Cultivated garlic is sterile – the plants are technically clones. If the scape and bubils are left in place, the plant will use energy to grow them that could be better used to grow the bulb. So clip the stem off early for best results.

Hardneck garlic has fewer but larger cloves than softneck. Most people prefer the taste of hardneck, but they don’t store well as their outer protective bulb wrapper is especially thin.

How Much Seed Garlic do I Need?
First, figure out how many bulbs or pounds of garlic you would like to harvest. On average, one pound of seed garlic will plant 20-25 row feet of garlic when planted with 6 between cloves.

Each pound of hardneck seed garlic has about 35-50 cloves. As each clove grows into its’ own plant and bulb of garlic, each pound will yield 35-50 garlic bulbs (approximately 4-7 pounds).

Each pound of softneck garlic seed has about 50-70 cloves, as softnecks have more cloves per bulb than hardnecks. This will yield 50-70 garlic bulbs (approximately 6-10 pounds).

This guide provided by Sow True Seed, 146 Church Street Asheville, NC. 28801
For more information visit their website at http://www.sowtrue.com
Or their blog at http://sowtrueseed.com/

I know that I will be planting my own garlic this fall, and I hope you will all join me in improving your cooking, by growing your own garlic!

Friday, September 9, 2011

Pine Mountain Produce Goes Live on the Air- Pine Mountain, Kathleen Powers

       On Wednesday evening Pine Mountain had the wonderful opportunity to be guests on the local community radio station, WMMT (88.7). WMMT is the Mountain Community Radio station based out of Whitesburg Kentucky. WMMT is an eclectic and fun station featuring  many different programs that bring a wide range of music and news to community. The station is founded on the principle that it is important to “provide opportunities for people in our community to speak up about matters that are important to them”. WMMT’s motto is “real people radio” and we definitely observed “real people” on air during  our night at the radio station as the hosts of “What’s Cookin’ Now” bustled around one small kitchen cooking a meal with no preparation time and a stove that decided to blow a fuse just about every 5 minutes.

            This is the second time that Pine Mountain has been featured on the show, June 2011 being the first appearance, in which Maggie Ashmore brought a mystery basket of produce that contained eggs, mint, garlic scapes, shittake mushrooms, rosemary, lettuce, radishes, and green onions.  For Pine Mountain’s second experience on the show, Maggie Ashmore, Claire, one of our environmental education interns , and I,  were invited for the September airing of What’s Cookin’ Now themed “Fall Harvest Mystery Basket”.  Maggie was asked to provide a selection of produce from Pine Mountain and our Grow Appalachia participants with which to surprise the hosts, Jonathan Piercy and Jenny Williams, for an on the spot meal preparation. Despite the almost constant rain this week, and the understandably suffering gardens, we were able to come up with quite a good selection of produce including:
Butternut Squash
Spaghetti Squash
Yellow squash
Sweet Potatoes
Banana Peppers
Green Bell Peppers
Green Tomatoes
Green Beans
Garlic
Mint
Parsley
Thyme
Rosemary
Fresh Eggs
Corn Meal
Local Honey
Sweet Tomato Jam
 All our beautiful Produce
The produce was all fresh (much of it harvested just hours before the show), beautiful , and provided a great preview of what our fall cuisine will look like. In an hour’s time a colorful and delicious meal came together in front of our eyes.  Jonathan and Jenny made the preparation of a gourmet meal look quick, easy, and fun, though they may disagree about it being easy due to their technical difficulties.  Their cooking was an inspiration for those evenings when you have a refrigerator full of food yet find yourself complaining “I have nothing good to eat!”, because really, if you take 10 minutes to survey your options, you could probably find a zillion different ways to use all that fresh produce sitting in the kitchen. And as our wonderful hosts demonstrated, delicious healthy food does not have to take hours of preparation or require a culinary degree to make it from stove to tabletop.
            The finished product of our hour on air was a table filled with mashed sweet potatoes with chipotle, quick pickled green tomato caprese, pasta with green beans and walnuts, green tomato gazpacho, corn meal cakes with a honey and sweet tomato jam balsamic sauce, and deviled eggs. Well now that I typed all that out I’m even more amazed at what Jonathan and Jenny were able to whip up in that time! But don’t be intimidated, those of us less experienced in the kitchen can still master their recipes with a few directions, just don’t try to tackle all 7 at the same time!

Here are 2 of the recipes that Jonathan and Jenny came up with for the show:

MASHED SWEET POTATOES WITH CHIPOTLE
Sweet potatoes
Chipotles in adobo sauce
Honey
Salt
Pepper
Cream (milk, heavy cream, ½ and ½, even plain yogurt would be good)
Trim sweet Potatoes, slice thick, and boil until soft. Drain and mash gently. Stir in some honey and a couple of chipotles, with plenty of the adobo hanging on them. Add a little cream, salt, and pepper. Taste and adjust.
Fresh as can be sweet potatoes!

QUICK PICKLED GREEN TOMATO CAPRESE
Green tomatoes                 
Rice Wine Vinegar
Salt
Black pepper
Honey
Fresh Mozzarella
Herbs, assorted (parsley worked well)

Slice green tomatoes as thinly as possible (a mandolin is excellent for this). Make a brine with rice vinegar and salt—you want about a 5% brine for pickles, and a cup of liquid to a tablespoon of salt will get you pretty close. Add a big dollop of honey—more than you think, since you have a lot of sour to counteract. Add a little black pepper. Taste and make sure it’s tasty.

Submerge the tomatoes in the brine. Toss them around occasionally. In 30-45 minutes they be nice and pickly. Arrange them on a plate with chunks of fresh mozzarella and sprinkle some herbs on top.
Quick Pickled Green Tomato Caprese

For additional notes on these recipes and more of Jonathan and Jenny’s kitchen genius visit their blog at: http://wmmtcooks.blogspot.com/

You can listen to What’s Cookin’ Now on the first Wednesday of every month from 6-7pm on WMMT 88.7 FM or stream the show live at:  http://appalshop.org/wmmtfm/

I know that here at Pine Mountain we will be listening to the show every month, however, we suggest tuning in to WMMT anytime of the day or month to enjoy and support this great local radio station!