Tuesday, September 4, 2012

The Botany Lab

Sr. KC here at St Vincent Mission where we are always looking for ways to expand our outreach. The Grow Appalachia Program has been a wonderful vehicle for that expansion. We not only work with families in helping them grow and preserve more of their own food but we are helping to establish a Friends of the Market support group for the Floyd County Farmer's Market and we are working in all levels of the education system here in Floyd County. This post is about one of those education partners--The Big Sandy Community and Technical College.

In February, Sr. Kathleen and I met with Thomas Vierheller, Science Department chair about the possibility of starting a community garden at the college. The idea was met with great enthusiasm and while the paperwork took an awful long time we finally broke ground on the garden in April with five 20' x 4' raised beds. As noted in earlier posts, the beds have been tended by college and community folks and the food raised has all been donated to local food pantries.

At one of our first meetings, Tom had mentioned that he would love to use a bed for his botany class but unfortunately they only met in the fall "after planting season". I quickly pointed out that one of the goals of the Grow Appalachia program is to show how to extend planting seasons. "There are several crops that do quite well in the cooler fall weather", I told him. "And there are ways to extend the growing season well into the fall".

Two weeks ago the botany class did their first lab in the outdoor classroom of the community garden. They planted a four foot section of lettuce at one end of the bed, a four foot section of snow peas at the other end and twenty-four broccoli plants in the middle. The lettuce and broccoli will be covered with row cover while the peas will be left open for pollination purposes. And the best part is since this is a college class, there will be tons of documentation--paperwork that I don't have to do!! I will keep you informed on the progress of the beds, the class and the project. Until then, stay green and growing.


For the Aubergine Fiend……, and those so Inclined to try something new! ~ Pine Mountain, Kathleen Powers


   Eggplant (also known as aubergine) may seem like an odd topic for a blog post, I mean really how much can you write about eggplant. But that’s exactly why I’m writing this blog, I feel that eggplant deserves more attention than it gets. A lot of our gardeners are growing eggplants but have no idea what to do with them once they are harvested, or in some cases, they don’t even know what those strange purple vegetables are that they are growing. I have already been given eggplant from several participants this summer because they have no idea what to do with it, they just wanted to see what it was and how it grows (which is good enough reason for me, but if it was being eaten as well that would be even better).
   Eggplant is a member of the nightshade family along with potatoes, tomatoes, sweet peppers, and more.  Eggplants contain a host of vitamins, minerals, and phytonutrients, they are high in dietary fiber, contain high values of bone building manganese and heart healthy potassium. Eggplants also fall in the category of fruits and vegetables that is beneficial for the brain/memory, urinary tract health, and general healthy aging, what more could you want!?
   So why don’t more people love eggplant? Well eggplant is probably best described as having a spongy and bitter texture, which makes it sound completely unappetizing. However, with a little extra care and creativity eggplant can be made into a delicious meal. The first step in many preparations of eggplant is to sweat the eggplant (sprinkle salt on sliced eggplant and let it drain for several hours) or to soak it (soak sliced eggplant in milk in the fridge overnight). Both of these steps will help to take away the bitter taste of eggplant that so many people dislike (some preparations of eggplant will not require this, but if you are following a recipe it will give you all the details!). Once you have your eggplant sliced and de bittered there are many ways you can prepare it, everything from simple grilling or roasting to blending it into dips, topping pizza, pan frying, or making cakes!

Here are a few recipes that I love

Recipe: Sautéed Eggplant with Honey and Thyme (aspicyperspective.com)
Ingredients
Delicious eggplant with local honey
and thyme from the garden
  • 1 large eggplant
  • 2 cups milk
  • ½ cup flour
  • 3-5 Tb. olive oil
  • 3 Tb. honey
  • 2 Tb. fresh thyme leaves
  • Sea Salt
Instructions
  1. Peel the eggplant and slice it into thin 1/8 inch rounds.
  2. Place the eggplant slices in an airtight container and pour the milk over it. Cover and refrigerate overnight.
  3. In a small pie pan, mix the flour with 1 tsp. salt. Heat 2 tablespoons of olive oil in large skillet over medium-high heat. Line a plate with paper towels.
  4. When the oil is hot, dredge a few slices of eggplant in the flour and tap off the excess. Gently place them in the skillet and pan fry for 2 minutes per side. Remove and place on the plate to drain.
  5. Repeat with the rest of the eggplant, adding oil to the skillet as needed. Sprinkle the slices with a little more sea salt as they come out of the skillet.
  6. Serve warm, drizzled with honey and sprinkled with thyme.

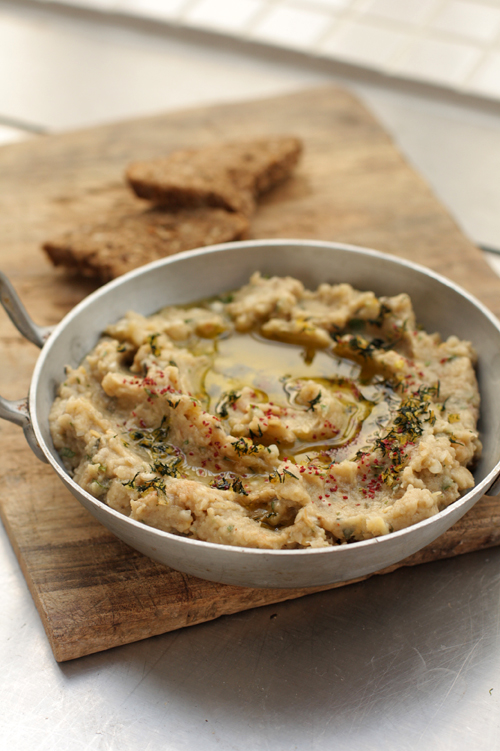
Baba Ganoush is a dip that is very similar to hummus; it can be used on raw veggies, crackers, pita bread, as a pizza topping or sandwich spread among other things.

Baba Ganoush (davidlebovitz.com)
 3 medium-sized eggplants
1/2 cup (130g) tahini (sesame paste)
1 1/4 teaspoons coarse salt
3 tablespoons freshly-squeezed lemon juice
3 cloves garlic, peeled and smashed
1/8 teaspoon chile powder
1 tablespoon olive oil
a half bunch picked flat-leaf parsley or cilantro leaves
1. Preheat the oven to 375F (190C).
2. Prick each eggplant a few times, then char the outside of the eggplants by placing them directly on the flame of a gas burner and as the skin chars, turn them until the eggplants are uniformly-charred on the outside. (If you don’t have a gas stove, you can char them under the broiler. If not, skip to the next step.)
3. Place the eggplants on a baking sheet and roast in the oven for 20 to 30 minutes, until they’re completely soft; you should be able to easily poke a paring knife into them and meet no resistance.
4. Remove from oven and let cool.
5. Split the eggplant and scrape out the pulp. Puree the pulp in a blender or food processor with the other ingredients until smooth.
6. Taste, and season with additional salt and lemon juice, if necessary.

Storage: Baba Ganoush can be made and refrigerated for up to five days prior to serving.


This recipe I have not tested, but I have eaten eggplant cake before, and it is delicious!

Eggplant Cake

1/2 c. butter
1/2 c. sugar
1/2 c. honey
2 eggs
2 c. grated eggplant
1 c. white flour
1/2 c. whole wheat flour
1/4 tsp. salt
1 tsp. baking powder
1 tsp. cinnamon
1/2 tsp. cloves
1/2 c. chopped nuts
3 oz. cream cheese, softened
1 c. confectioners' sugar
Ground nutmeg (for garnish)

1. Cream butter.
2. Add sugar and honey.
3. Beat in egg, and then stir in grated eggplant, the white flour, the whole wheat flour, the salt, baking powder, cinnamon, nutmeg, cloves, and chopped nuts.
4.  Pour into greased and floured tube pan. Bake at 350 degrees for 1 hour.
5. Cream softened cream cheese until light and fluffy. Gradually beat in the confectioners' sugar. Drizzle on cooled cake, sprinkle frosting with nutmeg.

So give eggplant a try, and let me know what you think!

Friday, August 31, 2012

Events and Celery in Pocahontas County, WV ~by Renae

We have scheduled (and rescheduled) our last events for the growing season.  We are excited to be doing three of them with our High Rocks girls helping and learning along with our participating families. 

UPCOMING EVENTS in Pocahontas County

Tuesday, September 18 5:30-8:30 Preserving the BountyWater bath and pressure canning...dehydrating...smoking...freezing... Learn about and try some of the many ways to keep eating out of your and your neighbors' gardens all year long. This workshop will be at High Rocks.

Sunday, September 16 2:00 pm  Medicinal Plants
Medicine County Herbals presents 10 medicinal plants of Appalachia: How to identify them.  Where to find them.  How to use them.  This workshop will be at the Pearl S. Buck Birthplace. 
 Tuesday, September 25 5:30-8:30 Healthy Baking and Cooking Bake, roast, and steam your way into good health and great eating using seasonal produce. Advance recipe suggestions welcome! This workshop will also be at High Rocks.
Saturday, September 29th (afternoon) Harvest CelebrationThis is an event you won't want to miss! We will be at the Opera House in Marlinton with all kinds of goodies for you--knowledge, seeds, garlic, music, potluck, and even a local produce pagent! This event is happening along with the fabulous Roadkill Cookoff and Harvest Festival and High Rocks' annual NettleFest. If you know of any families in the Hillsboro or Marlinton areas who would like to be a part of Grow Appalachia next season, this would be a great thing to invite them to so they can learn more about us! More details to follow about the timing of all of the events.
CELERY
Even with the challenges from the weather and animals, there has been great success in almost all of our participating gardens. One of our participants over by Snowshoe Mountain grew some very impressive celery from seed. The height and thickness of her celery plants is incredible. We have not had much luck with celery, we were glad to see that someone had.


The Corn Post ~by Erica at High Rocks


With the presidential campaign heating up, there’s a lot of talk about the American Dream right now. Today, after biting in to the first ear of corn I ever grew, I am pretty sure I am living it.

Scientists believe that people living in Northern America began cultivating ”corn” more than 7000 years ago. By saving the kernels of the best examples of teosinte, a wild grass, for many generations, corn or maize became a staple of the aboriginal diet in the Western Hemisphere. Now, a starting material for several fuels, animal feed, and found in many processed foods, it’s hard to imagine modern life without it.

Much has been written about the exquisite joy of eating fresh corn on the cob, so I won’t add to that canon. Instead, I researched some alternative uses for the parts of corn we don’t usually eat.

What to do with the rest of the corn plant?
  • Scarecrows! The husks are the stuffing as well as the covering for the head and the stalks make the arms and legs.
  • Dry the leaves and stalks, grind them and use as mulch. This material is great to keep strawberries dry and off the ground while retaining moisture for the roots.
  • Compost. This takes a while, up to 6 months if the plant isn’t chopped up. One way to chop: stuff everything in a bucket and attack with a string trimmer. Add good nitrogen sources like grass clippings to offset the heavy carbon load.
  • Craft projects: corn husk dolls, placemats, votives, trivets…
  • For the serious crafter or back-to-the-lander, take inspiration from Native American uses of maize: moccasins, bed mats, floor coverings…

Healthy Appalachian Humitas

Straight from our Grow Appalachia “test kitchen,” this recipe is inspired by the Peruvian version of tamales called humitas (oo-ME-tas). Rather than use corn flour as in tamales, humitas use fresh corn and are steamed. We adapted the recipe to account for the differences in our sweet corn and South American corn, “choclo.” Also, we substituted ingredients that are easier to come by and got rid of the generous helping of lard found in authentic ones. They are fun to make and eat—when you wrap the filling in the corn husks they look like little presents!

Ingredientes:
5-6 Ears of fresh corn in the husk
1/2 cup grated cheese (I used monterey jack)
1 fresh green pepper (sweet or hot, you decide)
1 tsp cumin powder
1 clove garlic
1 cup cornmeal
¼ cup milk
1 egg
1.5 tsp salt
1 tsp cumin powder

  1. Carefully shuck the corn to preserve the inner husks and cut the kernels off with a sharp knife.
  2. Combine all ingredients in a blender or food processor. The mixture should somewhat hold its shape in a spoonful. Add more cornmeal if it’s really runny or more milk if too thick.
  3. Overlap the thick ends of 2 husks by about 3 inches to make a little boat. Spoon in as much of the mixture as your little boat will hold. Fold over the ends and tie with a skinny strand of husk or leaf of corn. This takes a little practice, but even our messiest ones turned out fine.
  4. Steam for 30-40 minutes tightly covered in a steamer. I layered mine about 4 deep and they seemed to cook evenly.
  5. Cool slightly unwrap, and eat. (not the husks)

This recipe made 25 slightly savory, basic humitas. They could also be filled with raisins and cinnamon for a sweet treat or spiced chicken and pork for something heartier. You would just nestle a small spoonful of special filling into the corn mixture in each one. Experiment and enjoy the American Dream!

Tuesday, August 28, 2012

Fall planting discussions..: Tina

At our last Grow Appalachia meeting at LCAAHC which was Tuesday night, the discussion was on Fall Planting. As every one's garden is winding down and Coordinator Wayne Riley is making his way around to all the participants to turn the gardens under, many of our participants are eagerly waiting to start their Fall crops. If you plant by the signs, then the best time to plant the fall crops are Aug. 27, 28 & 29. Wayne passed out turnip, kale & lettuce seeds to name a few that are perfect for the cooler weather that is approaching.
We all love getting together and talk about our gardens and how well they produced. One gardener, Ricky had a 40 pound watermelon to show us, it was his first time growing them. Another, James Napier talks about how well his banana cantaloupes did. Many of us had never heard of this type of cantaloupe. It looks awesome. We also talked about trading seeds later in the year so anyone who wanted to try to grow something different next year had the opportunity. A few of our participants have heirloom seeds, such as the banana cantaloupe, that they have had for many generations


We enjoyed homemade salsa that one participant brought in, many brought jars of home canned goodies to show off. A few have been donated to the LAAHC to put of display for everyone to see. Everyone was excited to talk about what they had canned this year, many of our participants are first time gardeners and they were eager for all the information they could get. Most of our newer participants canned tomato sauce and/or juice, pickles, beans, corn. Others talked about canning zucchini, squash, potatoes, apples, peaches, jams and jellies. Canning recipes were passed around.

One I wanted to share was called:

White Chocolate and Raspberry Spread

Ingredients:
6 cups raspberries
1 vanilla bean, split lengthwise
1  1.75 oz. pkg. regular powdered fruit pectin
6 cups sugar
9 oz. whit baking chocolate (with cocoa butter), finely chopped
2 teaspoons vanilla extract

Directions:
In a 6 quart heavy pot, use a potato masher to slightly crush raspberries. Add vanilla bean. Heat raspberry mixture over medium heat for 5 minutes, stirring occasionally. Slowly add the pectin, stirring constantly. Bring mixture to a full rolling boil, , stirring constantly. Add sugar and return to a full rolling boil, stirring constantly. Boil hard for 1 minute,stirring constantly.
Remove from heat. Discard vanilla bean. Add white chocolate, stirring until chocolate is completely melted. Stir in vanilla extract.
Ladle hot spread into hot jar sterilized half pint canning jars, leaving 1/4-inch headspace. Wipe jar rims and adjust lids.
Process filled jars in a boiling-water bath canner for 10 minutes (start timer when water returns to boiling) Remove jars from canner, cool on towel that is on the counter.
Makes 8 half pints


Monday, August 27, 2012

THIS WEEK AT PROJECT WORTH OUTREACH

Good morning everyone.  This is Alex from Project Worth Outreach in Menifee County, Kentucky. 

It is hard to believe it is almost September.  We held our latest participant's meeting this past week.  We had a pretty decent turnout for this meeting.  During this meeting we discussed our journals, our August harvest numbers, fall gardening, the closing of our gardens {when and how}and had a class on care of late gardens and weather related problems.

According to most of our participants it seems that most our our journals are up to date with information about their gardens.

It appears that our July-August harvest numbers are going to be pretty good if early numbers are any indication as to what the final numbers are going to be.  We're really anxious to know the final results.

Several of our gardeners have planted fall beans and a few herbs.  Some participants have cleared parts of their gardens and stared making plans to cover certain areas of their gardens.

With fall coming on and school starting back up I would like to thank all of our summer youth workers.  I do not know how we could have done as much with our Community and raised gardens without them.  These young people were a tremendous asset to our program.  They worked very hard and did everything that we asked of them to the best of their ability with lots of enthusiasm.  I believed they learned a lot about gardening and the work, fun and satisfaction of gardening.  I hope that some of these young people, along with new ones, will join us next year if we are fortunate enough to be a part of Grow Appalachia next year.

Well, that's about all I have today except for this week's recipe which is listed below.  I hope everyone has a great week.


Swiss Steak

2 lbs. steak  {round or sirloin}
1 cup flour
1/2 teaspoon pepper
1 teaspoon salt
1/2 cup chopped onion
2 cups tomatoes {put through sieve}
1 garlic clove
1 /4 cup bacon drippings

Wipe steak with damp cloth, trim edges off; rub with garlic.  Mix flour, salt and pepper.  With a mallet or edge of plate, pound flour mixture into meat.  Saute` onions in bacon drippings, sear steak in the fat.  Bring strained tomatoes to a boil, cover and place in a slow oven {275 degrees} for 2 hours or more.  Serve hot and enjoy.

Gail Mills

Note:     These recipes are posted  as submitted to me.  Please feel free to modify these recipes. 

Friday, August 24, 2012

Flower arranging is dangerously addictive ~ Heather in Abingdon, VA

Heather here.

Gardening more than any other occupation reminds one of the ephemeral nature of our existence. Pull up the summer squash, plant brassicas. Eggs, nymphs, and pesky nibblers. Flower, fruit, seed. Unlatching petals and withering leaves. Plants are healthy one day, the next are speckled black, white, brown, or yellow with fungal diseases. The viruses move from plant to plant--wash your hands, burn the remains.

Plants sprout, vine, twist, curl in strange ways making us think of our own growth inside and outside the womb. How different our lives are, and how similar.

We will save seed from most of these flowers and give them out next season


When two pepper flowers are too close together one will sometimes encapsulate the other. When you slice open the ripe pepper there's a premature tiny green one. The mottled purple and white eggplants all have different speckling and streaks like experimental paintings. The garden is a constant scientific and societal study.

Just so many quiet things happening together at once. All of a sudden it seems the undesired grasses goes to flower. Some are allelopathic, sending signals through soil preventing other plants from growing. Foxtail Millet says, no one else can grow here except Foxtail Millet. 

Healthy plant societies can tell us a lot.

In any event, there has been an outbreak of different fungal diseases in our garden. It really seems to come all at one time. We took a few leaves to extension because we were unsure if all of the damage was fungus-related or if some was insect damage. We used our garden detective skills and did note what looked like sap-sucking damage on the underside of leaves, but there were no insects to be found. Very strange. What is this plant trying to tell us?

Two gardeners pondering


Have fun gardening in Southwest Virginia, among other things.

Our canning workshop went well. We will do it earlier next year....everything we will do earlier next year! I'm already picking out heirloom seeds--so many plant stories, so little time! We canned basil vinaigrette, pickled dilly beets, salsa, tomato sauce, and pickles with onions.

Deni Peterson in her element

Two gardeners learn together


Until next time...